Settings
Settings allows you to get information on various aspects of Leo operation and adjust it to suit your preferences. To access settings from the Projects screen, tap Settings.
This chapter covers the following scanner settings and some related topics:
Turn Off
Note
A single press of button on the scanner housing works as a Back button, i.e. it returns a user to the previous screen or state.
To turn off Leo scanner, follow the steps:
|
|
|
Important
A long press of the power button starts a hard reset. Use a hard reset sparingly, only if it is absolutely necessary, since it may lead to incorrect termination of the system processes.
Scanner
General

Figure 18 General ← Scanner ← Settings.
The General tab (shown in the figure) contains the following fields:
Parameter |
Description |
|---|---|
Scanner name |
Also a network hostname. Tap the field to change it. What characters to avoid? |
System |
Tap the field to see the versions of the scanner software and firmware and check for updates (details in the section below). |
Internal storage |
Shows how much internal storage space is available (in GB) on Leo. To clear the storage, tap Format. |
SD card |
Shows how much storage space is available (in GB) on microSD card. To clear the card, tap Format. |
Tap the Shut down button at the bottom right to safely turn off the scanner.
When proceeding to clearing the internal storage (via the Format button), you can also configure its encryption (see figure below). The general procedure is the same as described in Storage Encryption.
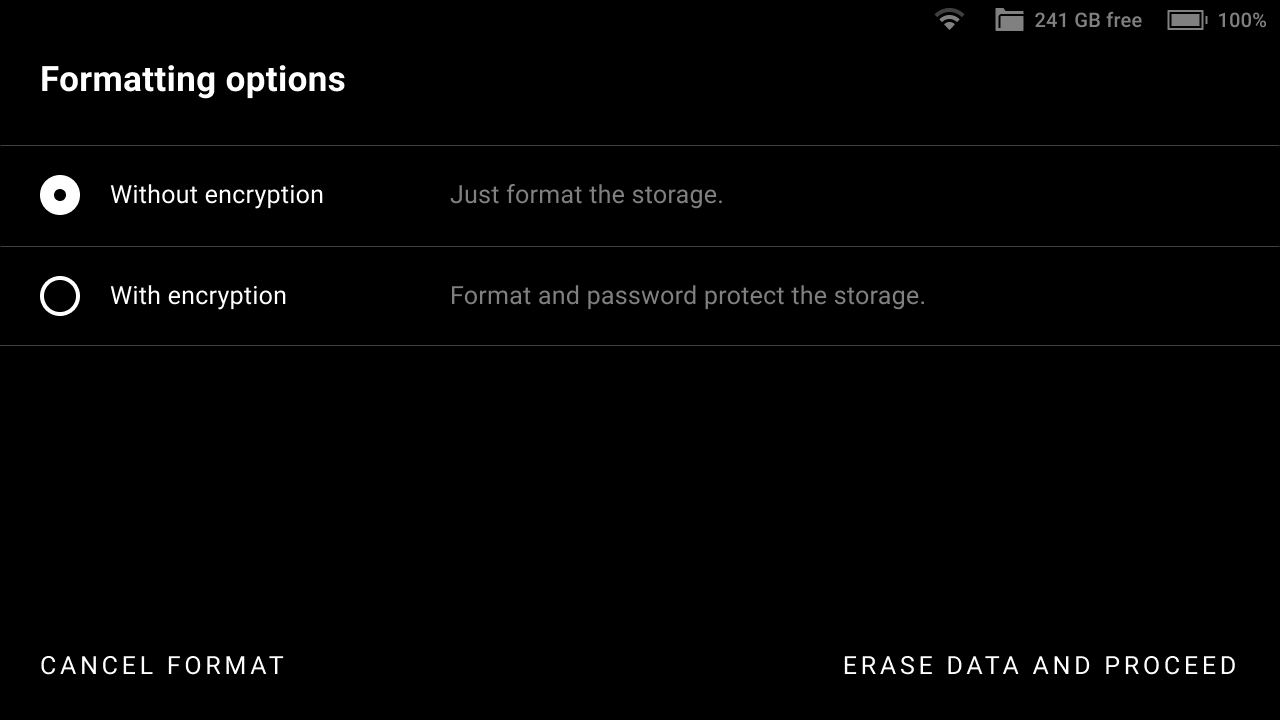
Figure 19 Options of storage formatting and encrypting.
Update Leo Software
To ensure that your scanner is running the latest version of software, select Scanner → General → System and then tap the Check for updates button. If Leo is connected to the Internet and there are no available updates (you have the latest software), you will be notified that Leo is up to date (see the figure below).
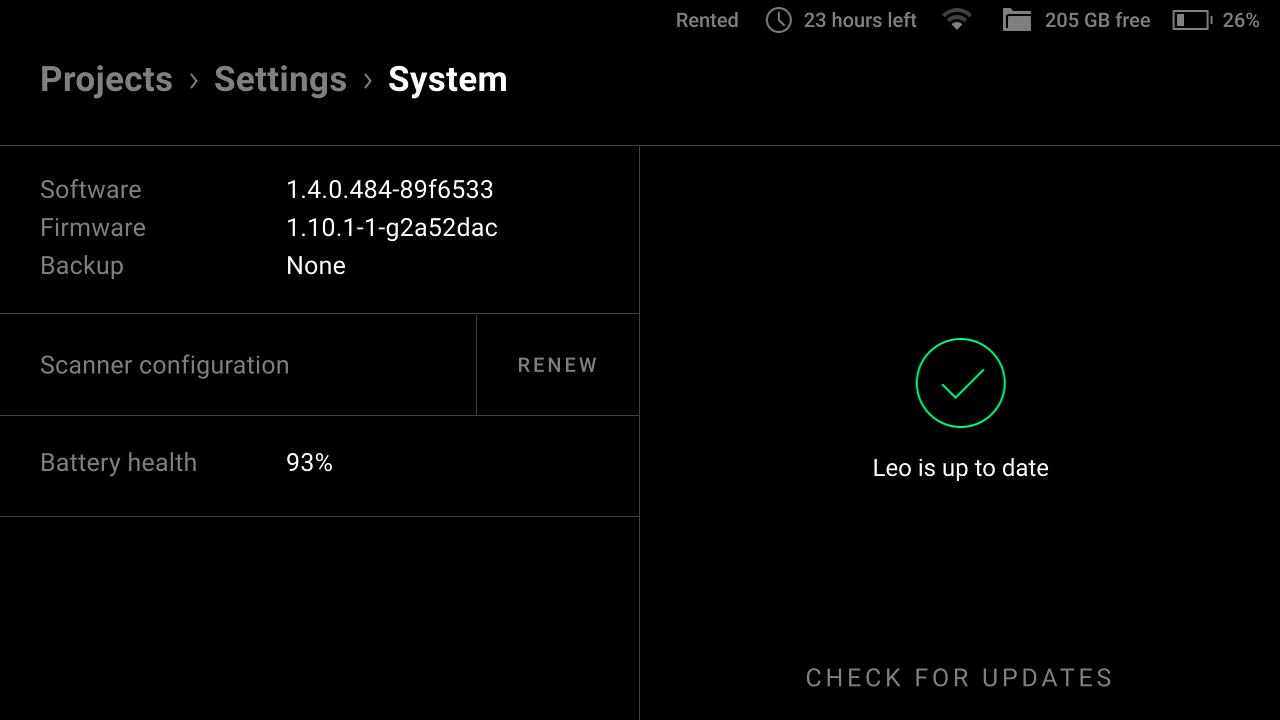
Figure 20 System ← General ← Scanner ← Settings.
If the update is available, then click the Update button and wait for the update to download.
Why Renew Configuration?
To access projects from Leo, you don’t necessarily need to use the same account both for the scanner and Artec Studio. A Leo owner may add any my.artec3d account as trusted from their profile at my.artec3d.
To download the latest scanner settings and license information, tap Renew in the Scanner configuration field.
Scanning Settings
The Scanning tab looks as shown in the figure below.

Figure 21 Scanning ← Scanner ← Settings.
The section allows you to make fine tuning of the parameters shown in the table below.
Parameter |
Description |
|---|---|
Targets |
Turn it on to enable the target-assisted scanning with Leo. See Enable Target-Assisted Scanning to find out how to configure this mode. |
Record HD data |
Turn it on to enable the scanner to capture high definition frames (see Enable HD Mode). |
Optimize project size |
Reduce the project size by only storing sufficiently novel captured frames or at least 3 frames per second. |
Horizontal base removal only |
Turn it on to instruct the scanner to detect and mark for removal only horizontal supporting surfaces in your scans (see Base Removal). |
Record without registration |
Turn it on to increase scanning speed (fps) and avoid tracking loss by delaying registration (Leo will be capturing all frames). |
Save primary texture |
The setting determines whether to record texture for key frames. |
Save supplementary texture |
Instruct Leo to record additional texture frames. You can manually specify the texture-frame rate in frames per second (fps). |
Maximum scanning speed |
Select the scale value to change Leo scanning speed (in frames per second) if you find it not appropriate for your needs. For example, if you’re just starting to use Leo, it’s a good idea to choose a slower scanning speed, so that Leo will record fewer identical frames. You will avoid data redundancy and save your Leo’s storage space. |
Show frame counters |
Turn it on to display the number of captured frames and textures as well as scanning speed (in frames per second) in the course of scanning. |
Base offset |
By selecting the scale value (in millimeters), you can adjust the offset from the supporting surface to compensate for scanner error when determining this surface. |
Texture exposure time |
By selecting the scale value (in milliseconds), you can adjust the shutter opening time, thus changing the brightness of the scan texture. The longer the time, the brighter the texture. However, bright texture can convey fewer details. If you decrease this value, provide sufficient ambient lighting to ensure the robust tracking. |
Use texture flash |
By default, the texture flash is on. Turn it off if you cannot use it due to circumstances. Note that turning the flash off must be compensated by sufficient ambient lighting. |
To reset the settings, tap Restore default settings at the bottom right of the screen.
Enable HD Mode
To enable or disable the HD mode, follow these steps:
Select Settings → Scanner → Scanning.
Tap Record HD data.
To disable the HD mode, select Off (only SD scans will be recorded in this case). To enable the HD mode, select the desired frequency of HD data recording.
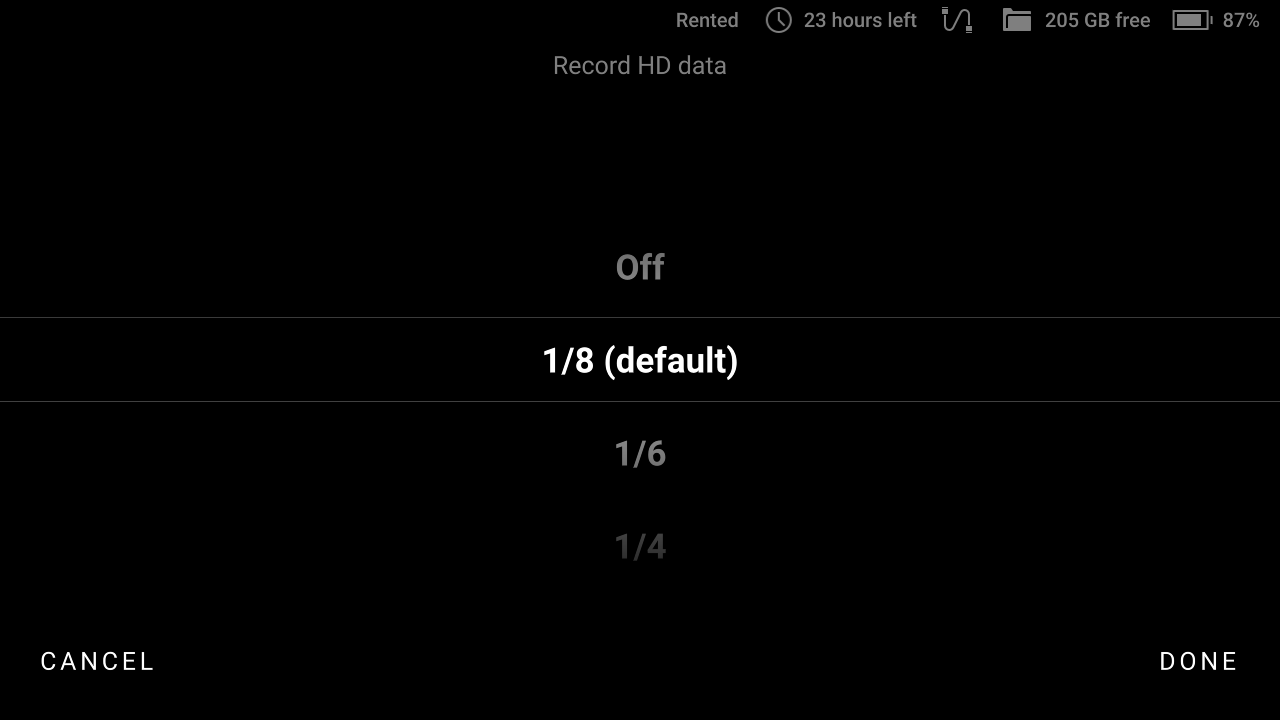
Figure 22 Selecting the frequency of HD data recording.
The matter is that the HD data are very heavy and, therefore, we cannot save every frame of the HD resolution in Leo’s memory. The frequency of 1/8 means that all frames will be saved but only every 8th frame will be an HD one.
The more HD frames you save, the larger the project will be and the more time will be required for its import and for constructing the surfaces from the raw data. The speed of scanning with higher frequency will be also lower. The recommended value is 1/8.
Enable Target-Assisted Scanning
To enable the target-assisted scanning, follow these steps:
Select Settings → Scanner → Scanning.
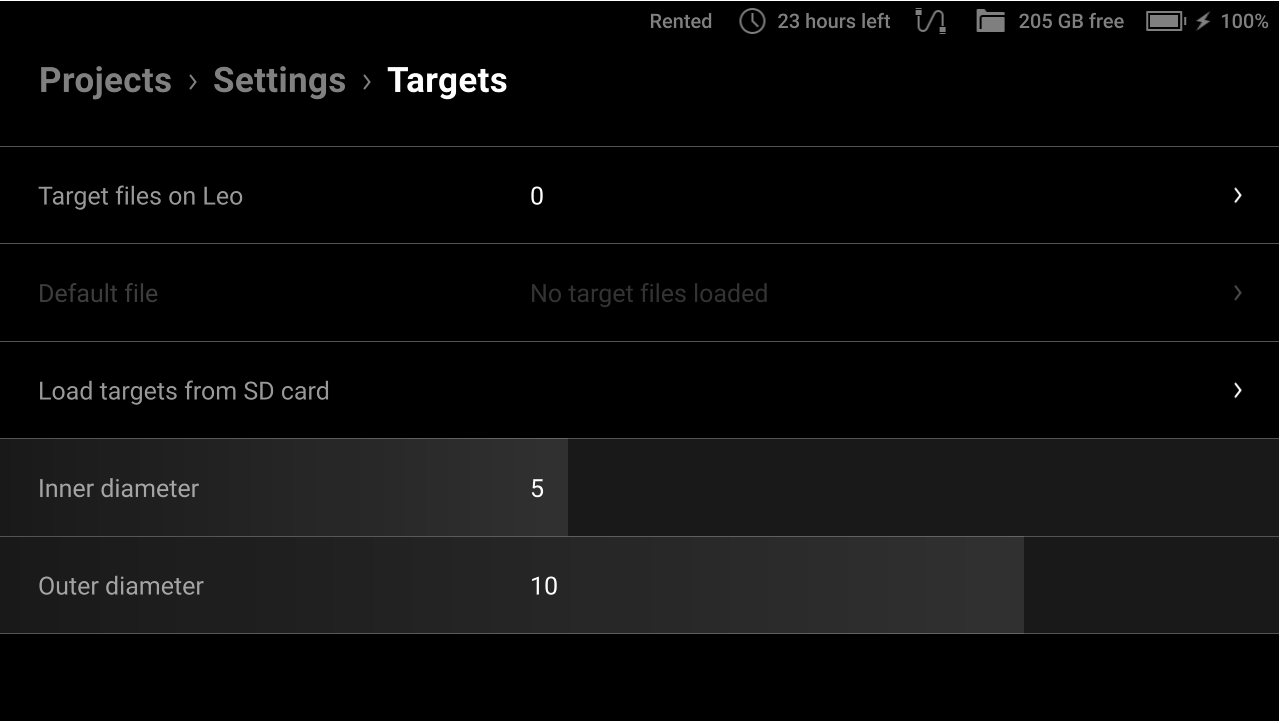
In the Targets line, tap Settings.
On the next screen, specify the inner and outer diameters of the targets and then tap Target files on Leo.
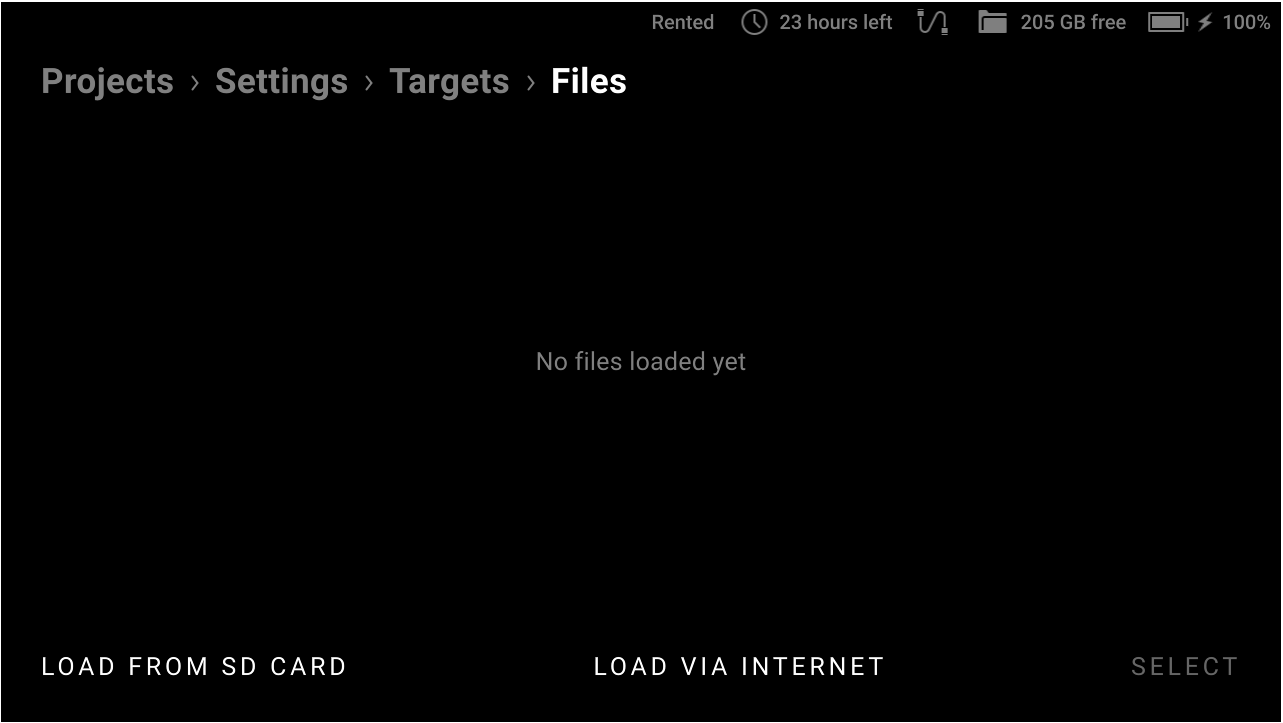
Select one of the uploading options:
If you select the Load via Internet option, the following screen appears.
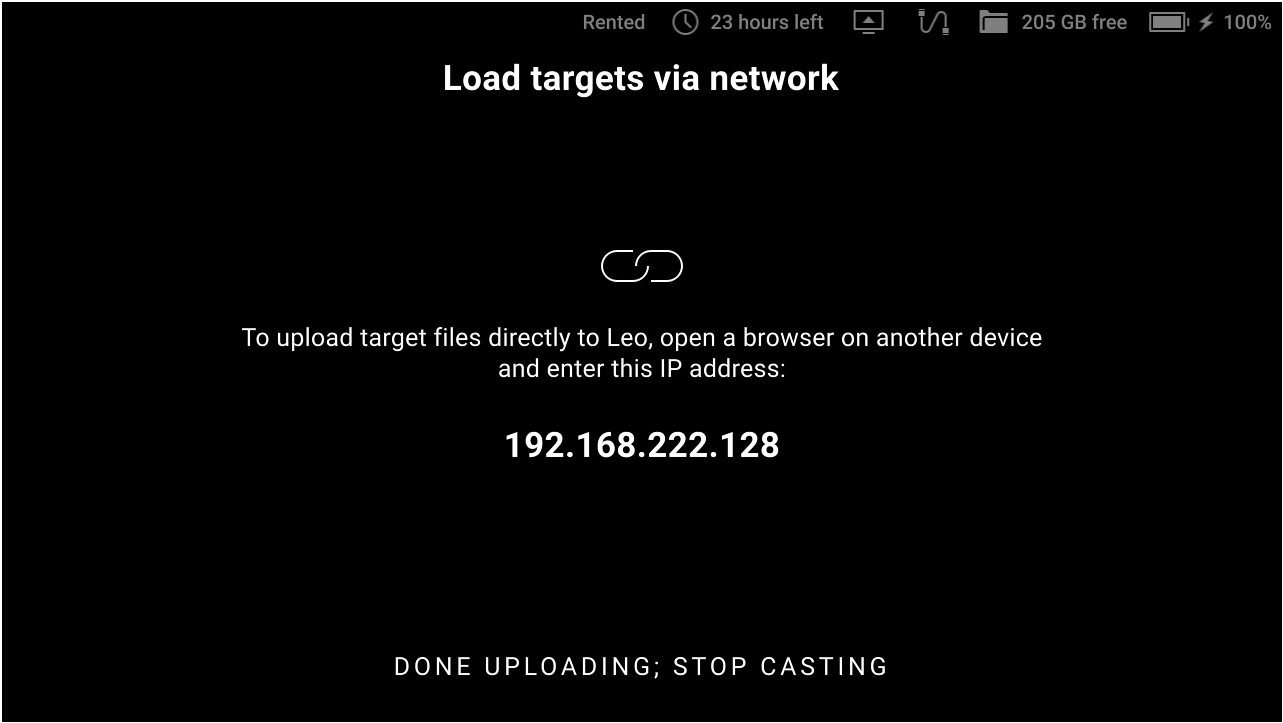
Figure 25 Instruction on connecting to Leo for targets uploading.
Open a browser on the computer where the desired target file (or files) is stored and enter the IP address shown on Leo’s screen into the address bar. Leo’s response will appear in the browser.
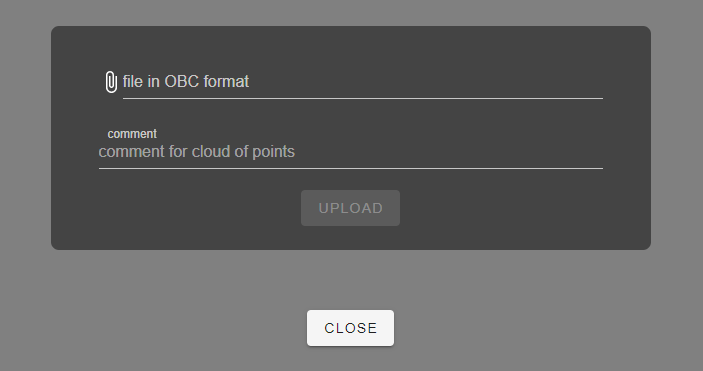
Figure 26 Leo’s response in your browser.
In the line with the paperclip icon, specify the path to the target file in the
OBCformat along with its name. In the comment field, you can provide a short custom name that will be used for the uploaded target file on all Leo’s screens.Tap Upload and wait until the processing is finished.
If you select the Load from SD card option, the following screen appears.
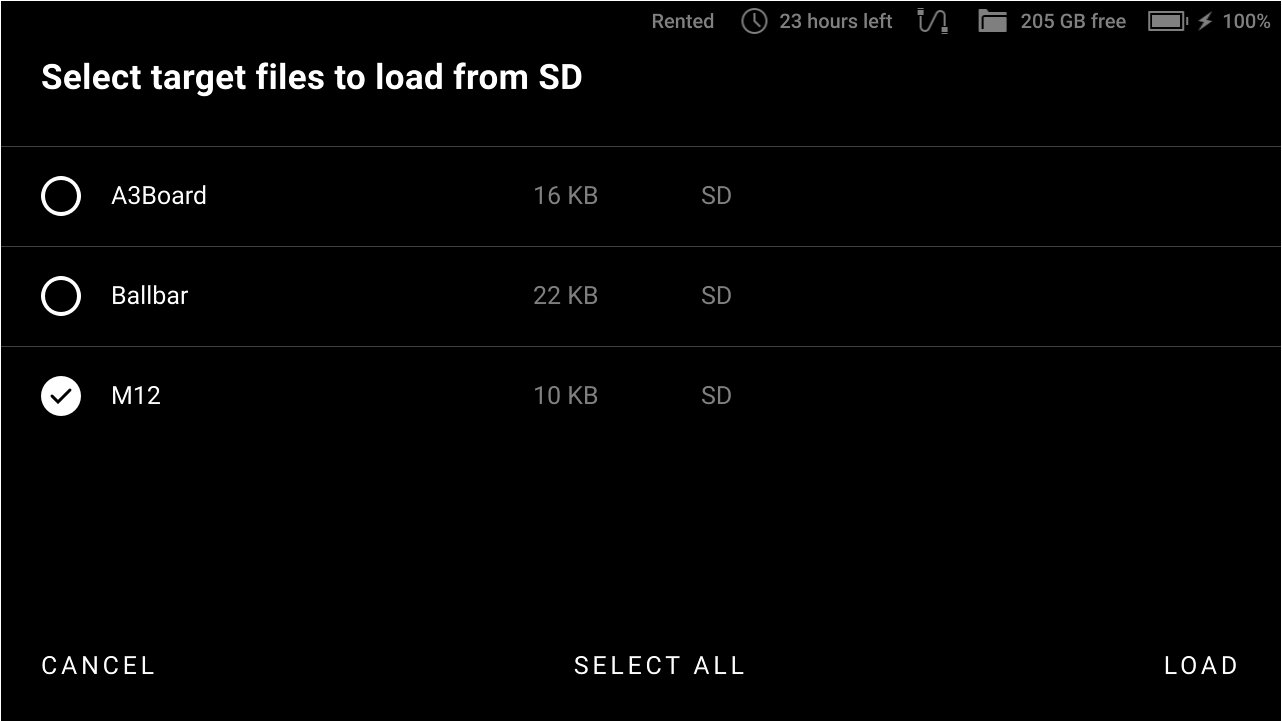
Figure 27 List of target files available on the microSD card.
Select the required target file (files), tap Load and wait until the processing is finished.
Once the uploading is complete, choose the default target file for the next scanning session and tap Select. The resulting screen will look like in figure below.

Figure 28 Uploading of target files is complete and the default target file is selected.
Advanced Settings
The Advanced tab shows miscellaneous parameters:
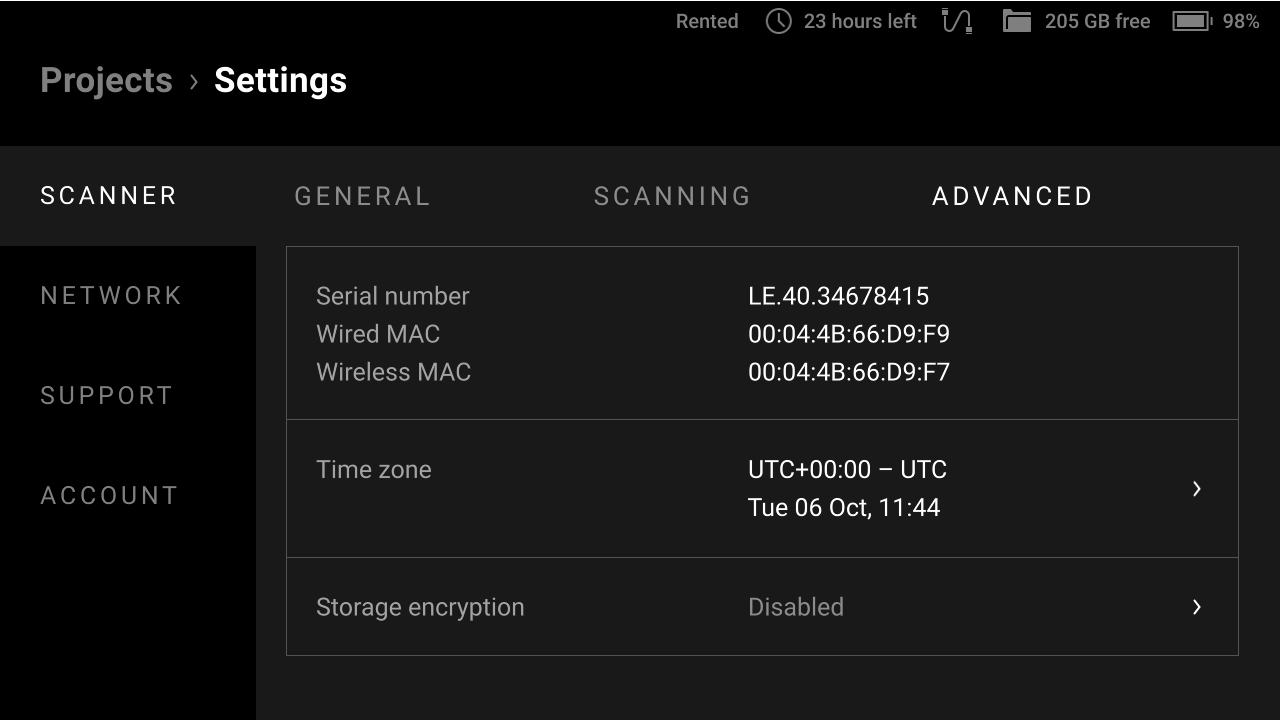
Figure 29 Advanced ← Scanner ← Settings.
Parameter |
Description |
|---|---|
Serial number |
Shows the serial number of the scanner |
Wired MAC |
Displays the MAC address of the Ethernet adapter |
Wireless MAC |
Shows the MAC address of the Wi-Fi adapter |
Time zone |
Displays the current date and time and allows you to select the required time zone. |
Storage encryption |
Shows the status of storage encryption (see Storage Encryption) |
Note
You cannot set the time manually because it is synchronized with a time server.
Storage Encryption
Storage encryption is a way to restrict access to Leo’s storage by using a password. Once the storage is encrypted, no one will be able to use the Leo scanner without knowing the password.
Warning
If the password for the Leo’s storage is lost or forgotten, it cannot be restored. In this case, to reset your password or disable the storage encryption, you will need to format the storage and erase all your data.
You can change the password for the Leo’s storage at any time without affecting your data. However, this would require entering the current password (see Changing encryption password).
Note
By default, the storage encryption is disabled.
The status of storage encryption can be one of the following:
Encryption status |
Description |
|---|---|
Disabled |
The storage encryption is disabled |
Enabled |
The storage encryption is enabled, the device is password protected. |
Attention
Both enabling and disabling the storage encryption require formatting the Leo’s storage, which means the loss of all stored data.
To enable the storage encryption, follow these steps:
Select Settings → Scanner → Advanced → Storage Encryption.
Tap Restart and encrypt storage in the lower-right corner.
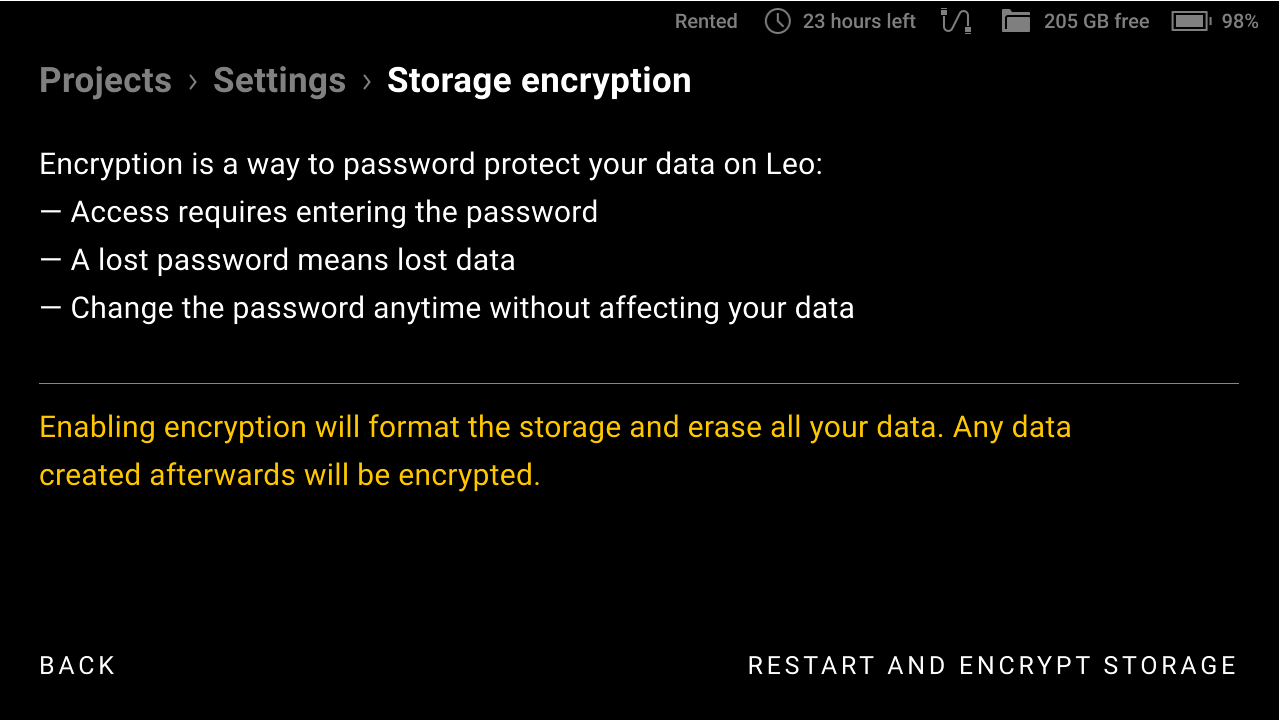
Figure 30 Enabling encryption.
Create and enter a password for accessing the storage and then confirm it on the next screen.
On the screen that appears, enter “Erase all” to confirm the erasure of all stored data and then tap Start encryption.
After this, the process of storage encrypting will start. During encrypting the progress bar will be displayed as well as the estimate of the remaining time.
To disable the storage encryption, follow these steps:
Select Settings → Scanner → Advanced → Storage Encryption.
Tap Disable Encryption in the lower-right corner.
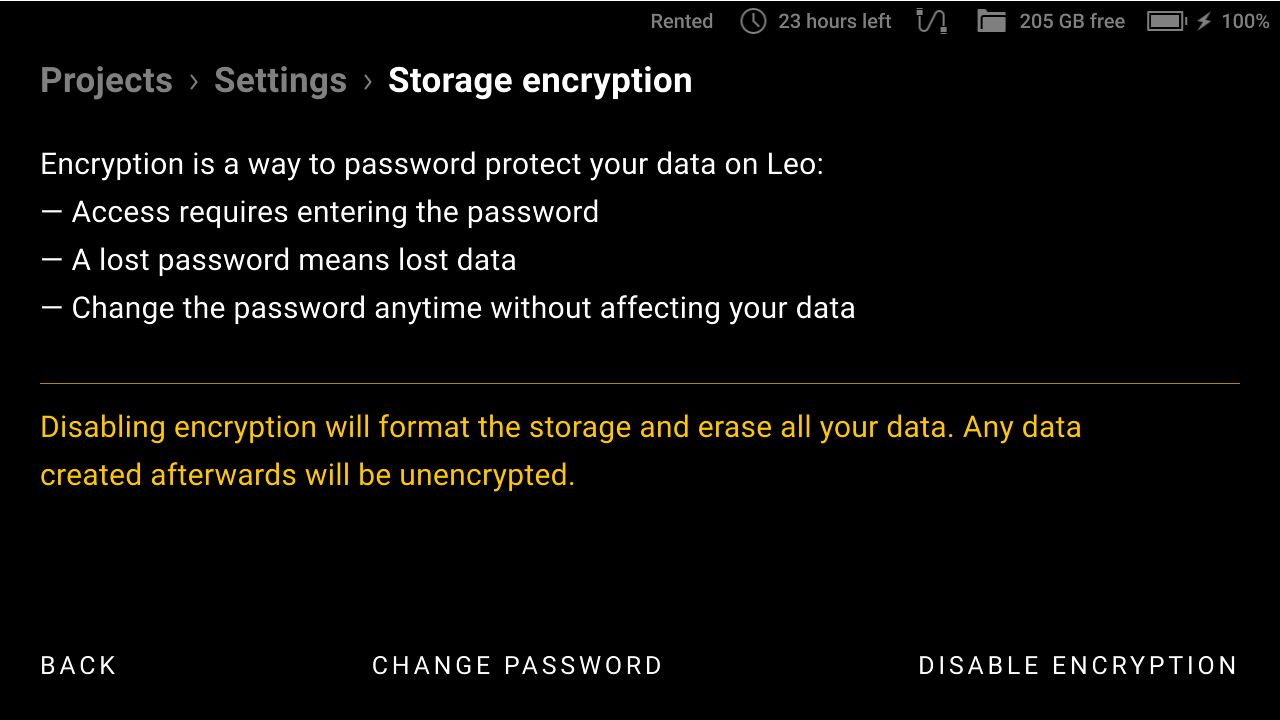
Figure 31 Disabling encryption.
After this, the process of disabling the storage encryption will start.
To change the password for the storage, follow these steps:
Select Settings → Scanner → Advanced → Storage Encryption.
Tap Change password at the bottom of the screen.
Enter the current encryption password.
On the next screens, enter a new encryption password and then confirm it.
The storage encryption password will be changed without affecting your stored data.
Attention
This password will be required every time you turn on your Leo, so be sure to remember or write it down.
Network
To transfer project files, Leo must be connected to the local network. For initial activation and regular updates, an Internet connection is required.
You can use both wired (Ethernet) and wireless (Wi-Fi) connection to set up Leo’s communication with other devices. Leo can connect to an existing network or create one itself.
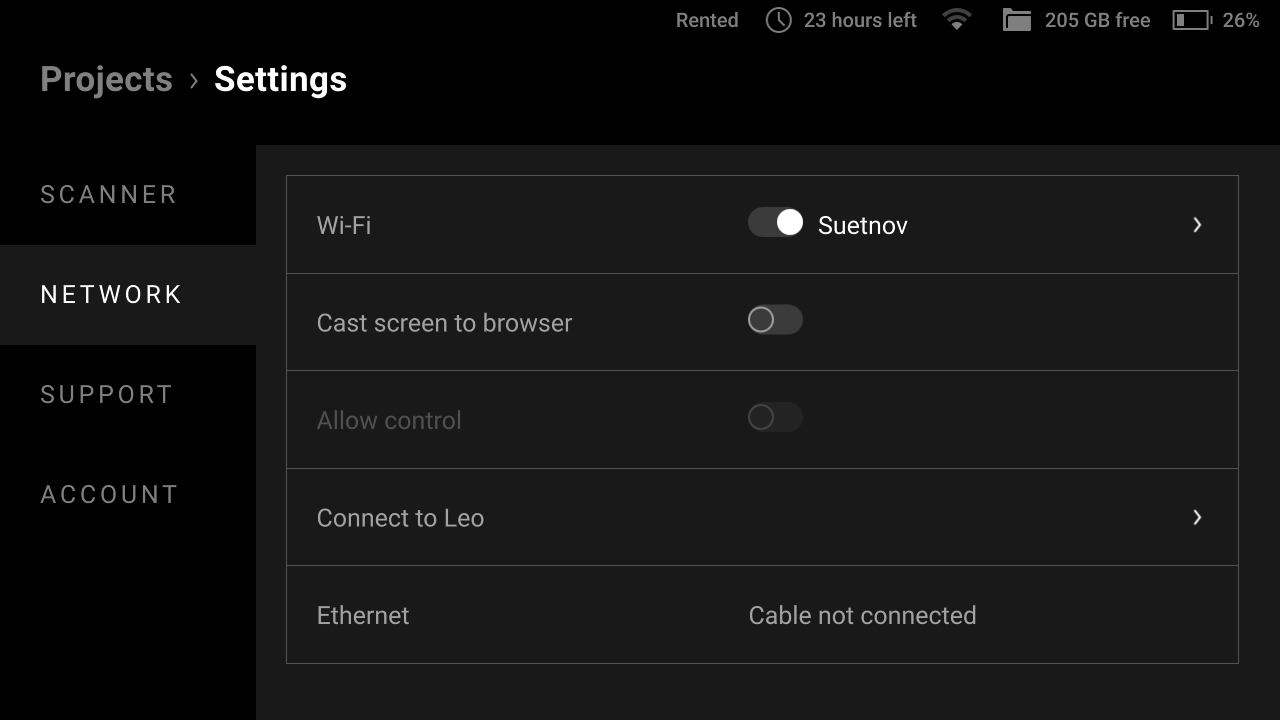
Figure 32 Network ← Settings.
Network Connections
To connect to an existing wired network, you need to
Connect the scanner via an Ethernet cable to a network device that provides the network operation (e.g. a switch).
Check that the scanner has obtained an IP address via DHCP.
Note
DHCP is a protocol that provides automatic central management for the distribution of IP addresses within a network. A DHCP server must be configured to automatically assign an IP address to a device in a network. For more information about DHCP server operation, contact your network administrator.
To connect to an existing wireless network, you need to
Turn on Wi-Fi to enable wireless connection.
Select the required Wi-Fi network from those found by your scanner.
Enter the password (key) for this network and tap Connect.
After successfully connecting to the network, the connection icon  will appear in the status bar.
To set up your own wired network with Leo, you need to
Connect the scanner via an Ethernet cable to a computer with Artec Studio software.
Select Settings → Network → Connect to Leo.
Turn on the Wired (DHCP server) toggle for the computer to automatically obtain an IP address from Leo via DHCP.
Configure the computer to automatically obtain an IP address via DHCP in the network adapter properties.
After these steps, you can interact with the scanner using Artec Studio software.
Warning
Be careful when using Leo as a DHCP server. If you connect to a network in this mode with another DHCP server, it may result in an unwanted network configuration.
To set up your own wireless network with Leo, you need to
Select Settings → Network → Connect to Leo.
Specify Hotspot name and Hotspot password for your future connection.
Turn on the Wireless (Hotspot) toggle.
Connect your computer with Artec Studio software via Wi-Fi to the newly created hotspot.
After these steps, the computer and scanner will be on the same network and ready to communicate.
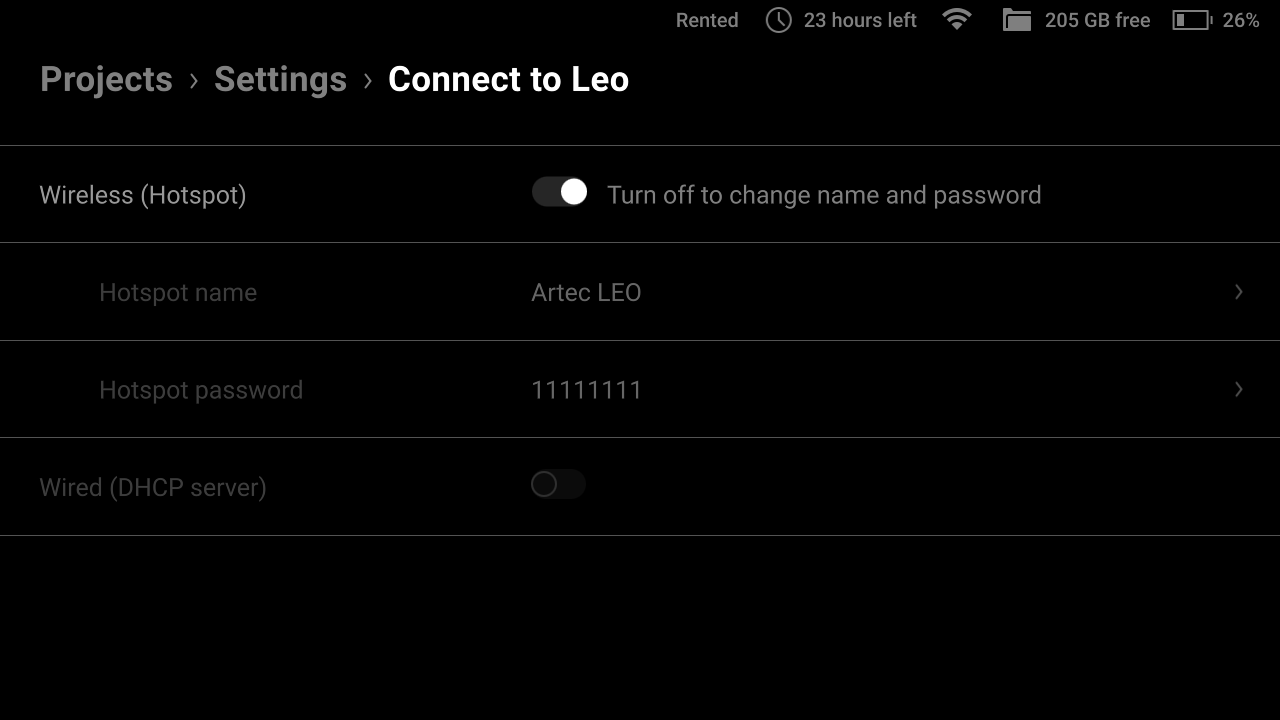
Figure 33 Connect to Leo settings.
Note
Connecting to existing networks (both wired and wireless) will allow you to access the Internet (if configured) to update the software, communicate with my.artec3d.com and download projects. Networks created by Leo (as a DHCP server or hotspot) allow only file transfer.
Cast Screen to Browser
The Networks section also contains screencasting controls. They are described in detail here.
Support
This section allows you to generate and send reports to the support.
For more information, see the Get Support chapter.
Account
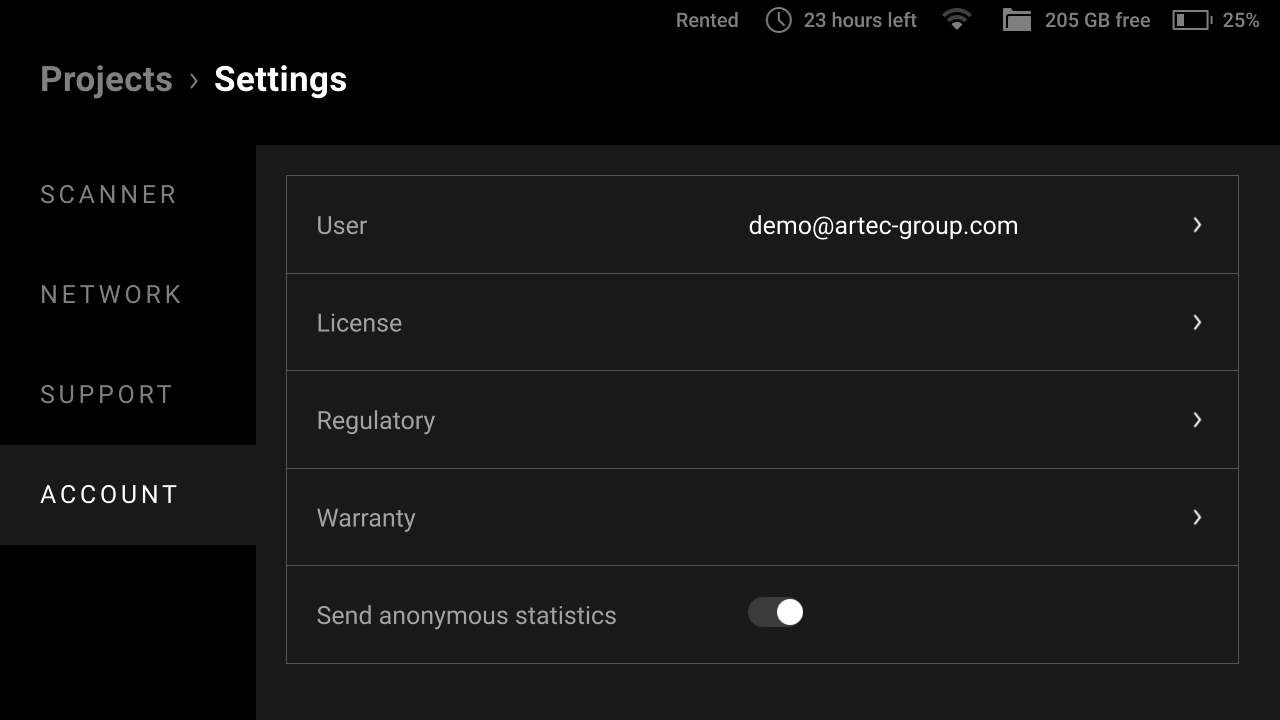
Figure 34 Account ← Settings.
The Account tab contains the following parameters:
Parameter |
Description |
|---|---|
User |
Select to view and edit user information. |
License |
Select the section to see the license agreement for the Artec Leo embedded software. |
Regulatory |
Select the section to see the regulatory compliance statements. |
Warranty |
Select the section to see the information about the legal warranty and liability of the parties. |
Send anonymous statistics |
Turn on the toggle to allow Leo to send anonymous statistics to Artec 3D to improve the quality of the product. |
User
The User tab lists the following fields:
Parameter |
Description |
|---|---|
MyArtec account |
Determine the my.artec3d account that you are using for your Leo scanner. |
Name |
Name for a person who uses Leo. |
User email |
Select to specify an email different from that used in my.artec3d account. The support team will use it as a reply-to address for the support reports sent from Leo. |
Log out and remove projects |
Use it to log out from this account and log in with another one. Note that you first need to back up your projects since logging out will delete them. |