Setting Up
The sections below will help you to set up your Artec Ray II scanner.
Heavy Duty Tripod Setup
Artec Ray II has been designed to be used on a tripod. You can use any tripod with an adapter that has 5/8” screw to accommodate scanner.

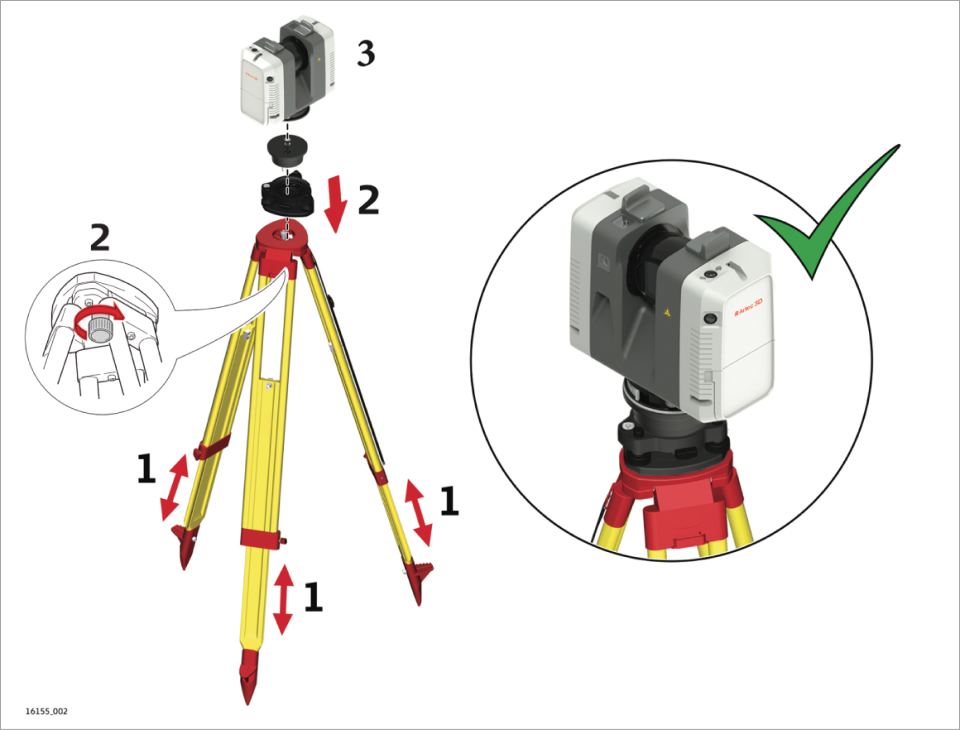
Figure 6 Artec Ray II setup.
To set up your scanner, follow the steps:
Extend the tripod legs to allow for a comfortable working posture. Ensure that the tripod plate is roughly horizontal.
Set the adapter on the tripod and secure it with the central fixing screw.
Place the scanner on the quick release mount and secure it.
Power Supply
For details regarding charging refer to Multicharger User Manual.
Batteries
Environmental conditions
The batteries must be charged before using them for the first time charging batteries because they are delivered with an energy content as low as possible. For optimal charging, we recommend charging the batteries at a low ambient temperature of +10 °C to +20 °C/+50 °F to +68 °F if possible.
Exchanging the Batteries
Note
The batteries are hot-swappable. Data acquisition requires two batteries inserted into the battery compartment. The scanner does not shut down when only one battery is inserted

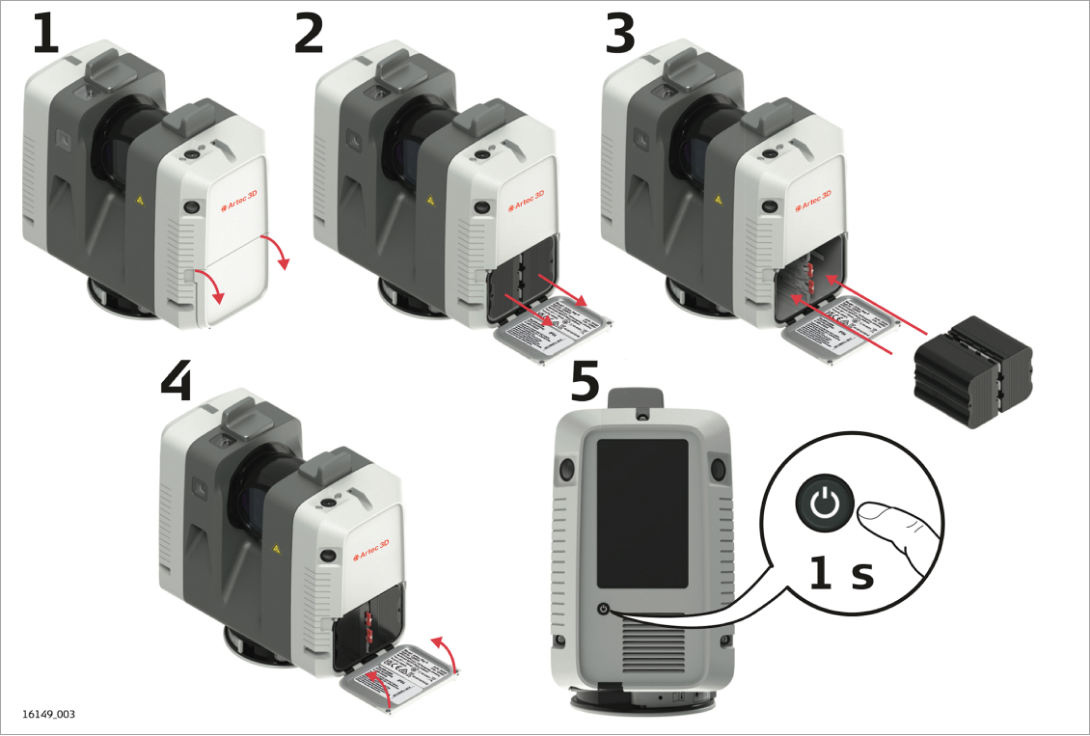
Figure 7 Exchanging the batteries.
To exchange the batteries, follow the steps:
Open the battery compartment.
Remove the left battery from the battery compartment by pushing the upper red button to the right. Remove the right battery from the battery compartment by pushing the lower red button to the left.
Insert the new batteries into the battery compartment.
Note
Ensure that the battery contacts are facing inwards.
Close the battery compartment.he bottom of the tripod legs to uncover spikes for usage on a soft ground. Do not use the spikes on slippery ground.
Turn on the scanner to start the boot process.
To obtain complete information about charging batteries, please refer to the “Power Supply” section in the full version of this manual (About This Manual).
Operation - Getting Started

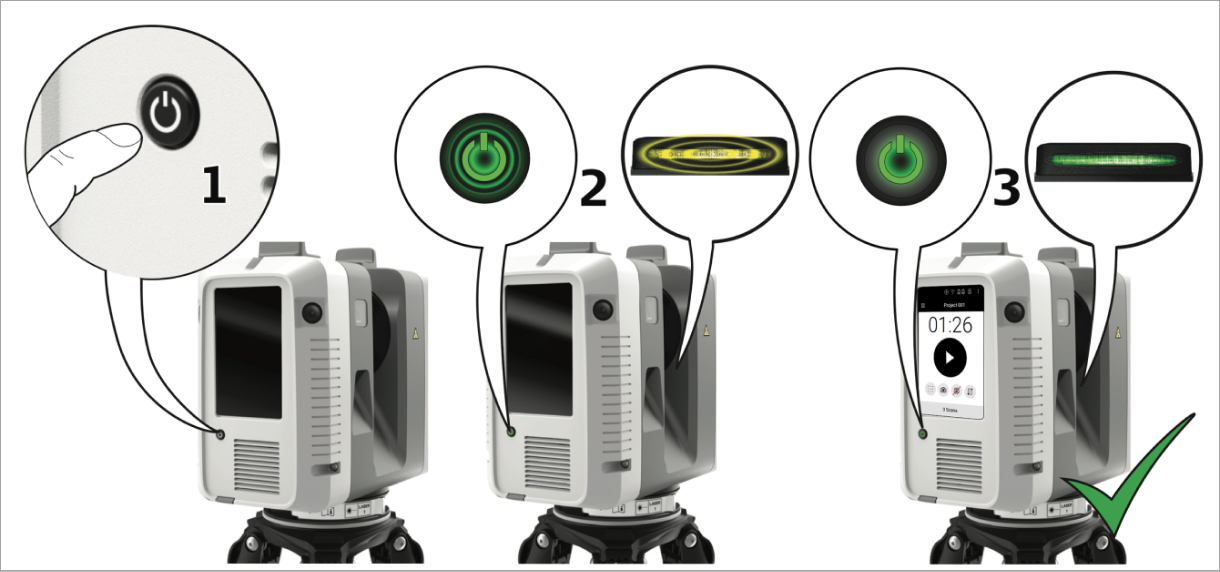
Figure 8 Artec Ray II Getting started.
Press the power button to turn on the scanner.
The scanner is starting. The power button is blinking green and the LED indicator is blinking yellow.
When the user interface is visible, the scanner is ready for operation. The power button and the LED indicator are now continuously green.
Connecting to a Handheld Device
Start the scanner and wait until the user interface is visible.
On the handheld device select Settings and tap WLAN.
Select the network ArtecRay-298xxxx in the WLAN settings to be connected.
Note
The number 298xxxx/3005xxx is the serial number of the scanner.
Enter the password.
Note
The scanner specific password is printed on the type label in the battery compartment, for example “test1111”.
Start the app and connect the scanner.