Scan
Prepare
Since Artec Leo is a self-inclusive device featuring computing and graphics processing units, you don’t need to connect it to a PC running Artec Studio while scanning. A built-in tiltable display allows you to focus on scanning and eliminates the need to have a laptop in your hands.
You may want to use Artec Studio later to process the scanned data.
Caution
Always grip the scanner by its handle; use your other hand for extra support when necessary.
About Color Overlays
Leo colors the scene that it scans. This coloring, or overlay can be made on the basis of:
About Tiltable Display
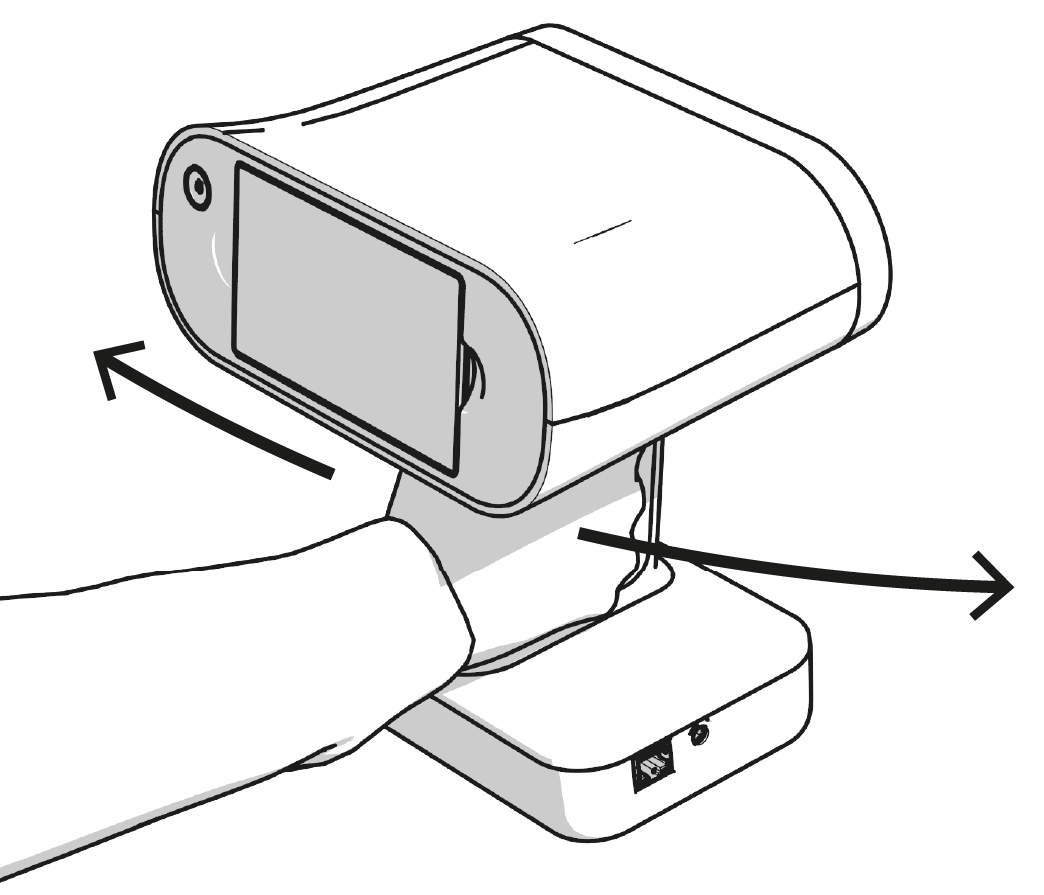
When scanning particular objects or regions, you may need to tilt or rise your Leo scanner. In this case, the display content may disappear from your sight. What comes in handy is the ability to tilt the display to observe the scanning scene:
Put your fingers into the finger recesses near the display.
Drag both ends of the display to tilt it down.

Figure 2 Tilting the scanner display.
To broaden your user experience with displaying 3D content, you may as well employ an external mobile device.
Prepare Object and Surroundings
Before scanning, ensure that the objects meet the following requirements:
They must be stationary.
They should have geometry and/or texture features.
They should have no black, transparent or reflective surfaces.
They should be uniformly lit.
There is enough space around the object for you to scan it.
If the object doesn’t meet all the requirements, it can still be scanned. You may need to prepare its surface (see the table below).
Transparent, shiny, reflective |
Dust with anti-glare spray |
Thin, fine or repetitive features |
Apply masking tape to the background and/or draw X’s on it |
Black glossy |
Dust with anti-glare spray |
Black matte |
Increase Texture brightness |


Note
In the HD mode, you can capture dark or shiny surfaces in high resolution, in their original shape and with no extra steps. See HD Mode for details.
About Targets
Typically, a target is a round sticker that has a black ring with a white circle in the center. The targets are placed on the object being scanned to ease identification of the various regions. Using the target-assisted scanning allows you to scan larger areas in one session, improve the accuracy of captured surfaces and boost productivity by reducing postprocessing time. You do not need to align the scanned surfaces after scanning, so you can immediately proceed to fusion (see Artec Studio Manual for details). The only downside of this method is the necessity of preparation.
To enable the target-assisted scanning with Leo, you need to perform the following steps:
Prepare a special target file in the
OBCformat that contain the coordinates of the targets. Such a file can be obtained, for example, by means of the Scan Reference kit (see Scanning with photogrammetry for details).Upload the target file to Leo and make it a default one (see Enable Target-Assisted Scanning for details).
After that, you can proceed to the Target-Assisted Scanning.
Scan
To start a new scan,
Tap New project or press
 . Artec Leo will start preview, i.e. building surfaces without recording them.
Adjust either parameter as necessary.
Direct the scanner at the object.
Practice your movements and assess the quality of the surface being reconstructed on the screen.
Once you’re ready, tap
 or press .
Scan the object from all possible sides.
Tap
 or press .
Rotate or turn the object upside down to scan the missing regions (go to step 3).
Tap
 in the upper-left corner if you are done with the scan.
Once you have recorded a scan, it is added to the project (see Project Structure).
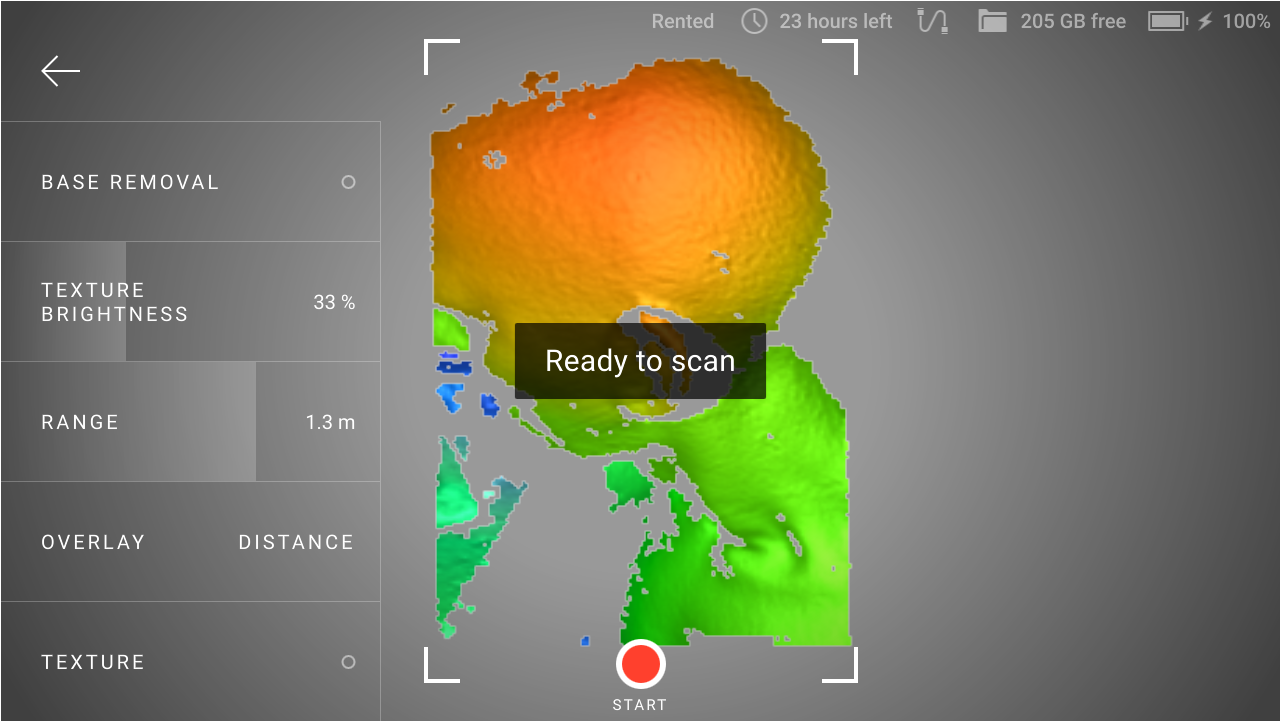
Figure 3 Scan screen.
Losing and Resuming Tracking
As you move the scanner, it captures a series of frames. Leo uses features in overlapping areas of these frames to automatically align them. This process is called tracking. If Leo becomes unable to continue building an object surface, it enters the tracking lost mode. It may happen, if:
You move the scanner very fast.
Scanner’s field of view contains insufficient surface area.
Leo in the lost tracking mode displays message: Point at scanned area.
Resume Scanning
To resume scanning,
Direct the scanner at a region you’ve already captured, maintaining the original scanner orientation toward this region.
If Leo recognizes the region, it will display the Ready to scan message and correctly orient the scene on the screen.
Press
to continue recording. Leo will continue recording data in a new addition.
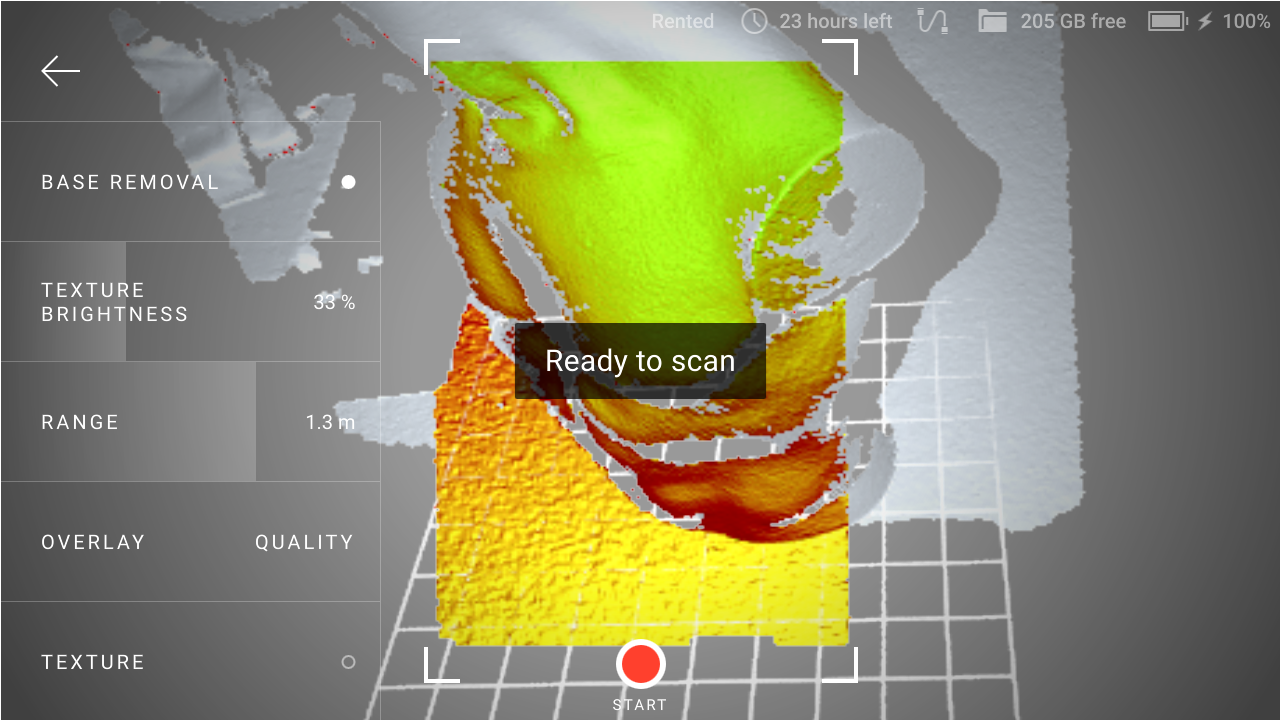
Figure 4 Leo has recognized the region and is ready to continue scanning.
Pause and Resume Scan
While scanning, you may need to pause capturing for various reasons. Press ![]() to this end.
to this end.
There are two ways to resume your scan:
Addition
If you want to continue scanning the same scene, create a new addition to a scan. A successfully created addition will be aligned with the previously captured 3D data.
To continue scanning in the same scan, follow the procedure covered in Resume Scanning.
New Scan in Project
If you intend to add a new scan that relates to the project, but either of the cases below is applicable, consider adding a new scan:
Scanning scene has changed.
You flipped the object.
To add a new scan,
Open the required project.
Tap Add scan.
Point the scanner at the object and press
.
Configure Scanning
You can set for scanning either of the following parameters.
HD Mode
HD mode is an AI-powered scanning technology for ultra-sharp, clean, and detail-rich scans.
Key advantages of the HD mode:
scanning with a high resolution of up to 0.2 mm
broad range of objects that can be scanned flawlessly and in high detail: from smaller, intricate parts like valve handles, to larger areas with fine details like car engines
little to no noise in raw data for cleaner post-processed data and saved time for your final 3D model
capability to capture dark or shiny surfaces in high resolution, in their original shape and with no extra steps
If you want to get the HD-resolution scans with Leo, first you need to Enable HD Mode.
When you start your project, you will see the HD recording button at the lower-right conner. You need to tap it before scanning to have HD frames in your project.
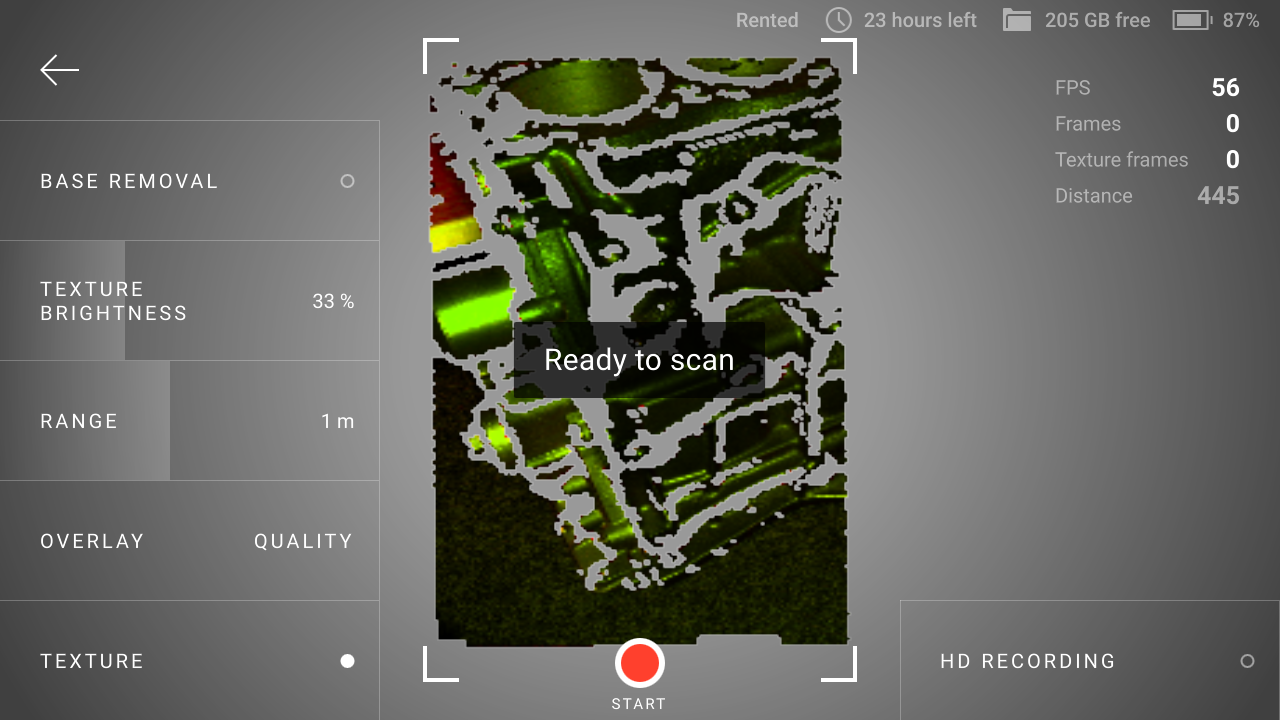
Figure 5 The HD recording button on the Scan screen.
Then you perform the scanning as usual. After you finish, you will see the HD label in the upper-right corner of your project preview image.
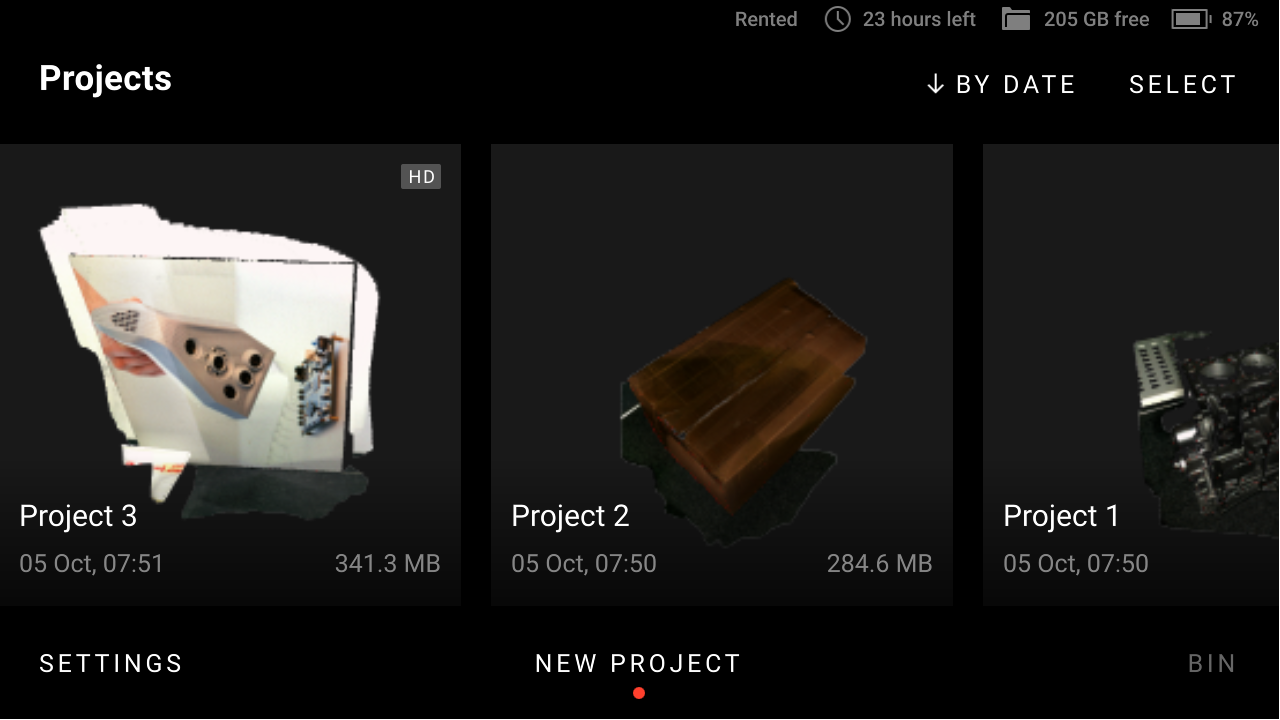
Figure 6 Project containing HD data on the left.
Texture
If you want to see texture while scanning,
Press
to start Preview.Ensure that Texture mode is activated.
Note
During scan, Leo displays texture blended with quality overlay. To observe pure texture, stop scanning.
Base Removal
Once imported in Artec Studio, scans from Leo can be cleared from base, i.e. flat surface that supports object being scanned. The following recommendations might help you decide whether you need this option.
Objects to scan |
Options |
|---|---|
Distinct vertical object |
Base removal is on |
Entire scene, floor, table |
Base removal is off |
Object sticking out of a wall |
Base removal is on and Horizontal base removal only off |
To enable base removal,
Press
to start Preview mode.Ensure that Base removal is turned on.
Direct the scanner at the flat surface which you intend to leave out.
Press
to start scanning.
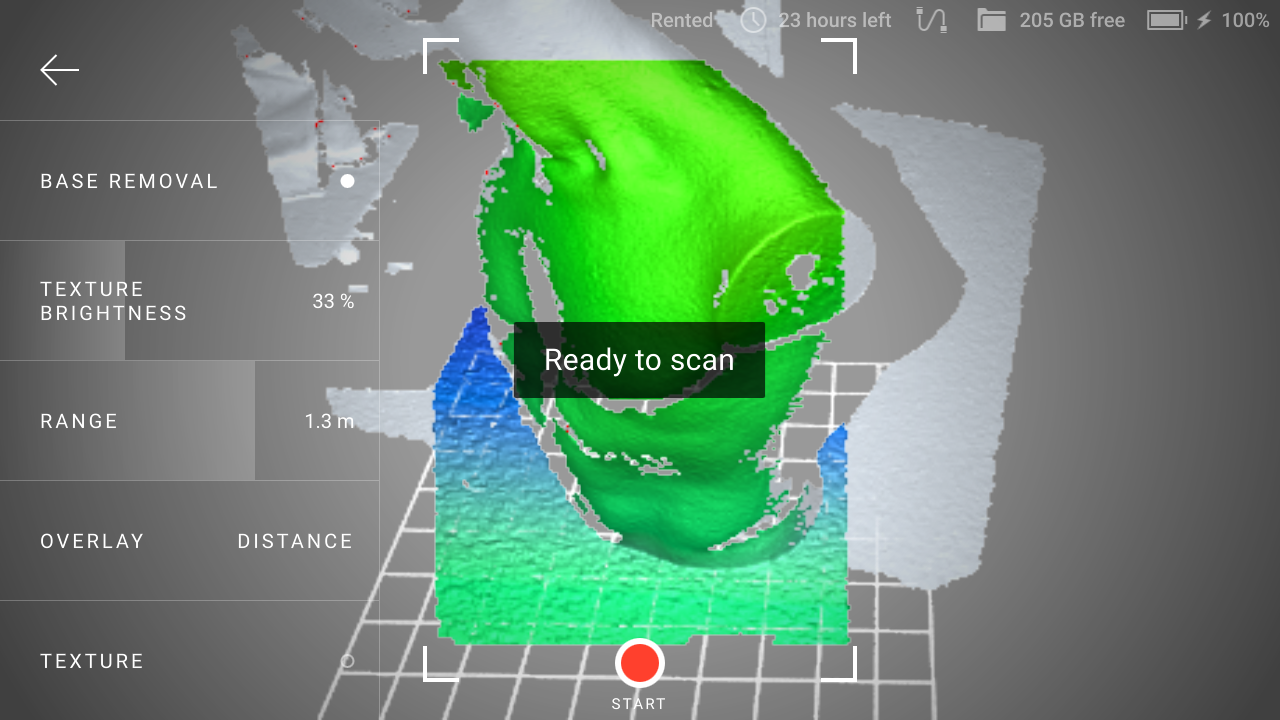
Figure 7 Detected base.
Before you import project, ensure that the Launch base removal for Leo scans checkbox is selected in Artec Studio settings.
Texture Brightness
You can adjust texture brightness for scans.
Tap New project or Add scan. Leo starts Preview.
Direct the scanner at the surface with rich texture which you can use to assess texture quality.
Move the Texture brightness slider left and right to set an optimal value (as a percentage).
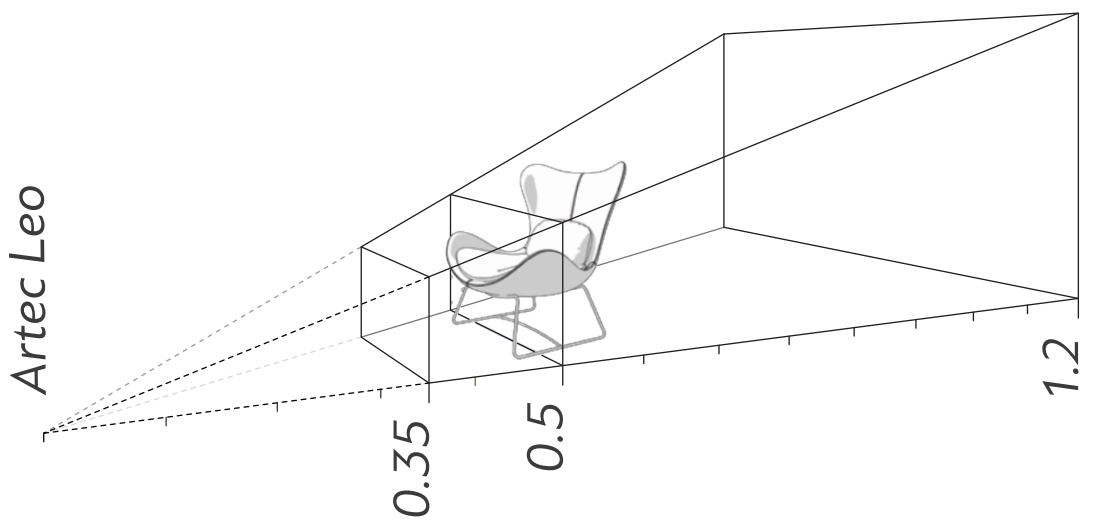
Scanning Range
Leo’s default scanning range is from 0.35 to 1.2 meters. Optimal distance for most objects is about 0.5 meters which corresponds to the middle of this range. Surfaces recorded at the far distances might be of bad quality. You may want Leo to cull these distant surfaces, i.e. shrink its field of view by adjusting position of the farthest plane:
Press
to enter Preview mode.Move the Range slider left and right to set an optimal value.
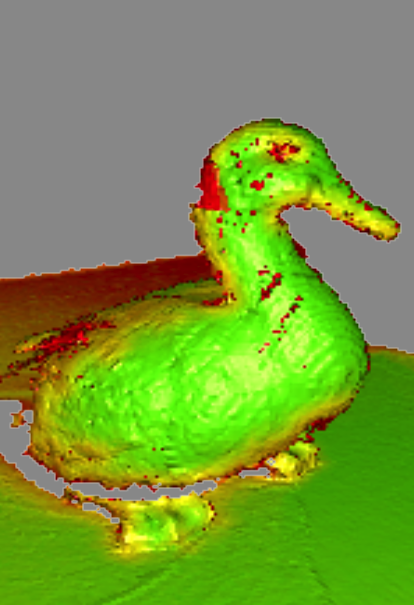
Quality Overlay
Once you start scanning (after a preview), the scene will color indicating the scan sufficiency.
Red |
Insufficiently scanned area 1, distant object, fast movements |
|---|---|
Orange |
Satisfactory scanned area |
Green |
Well-scanned area |
- 1
Holes and thin edges may remain red and orange even if thoroughly scanned. This happens because these regions are likely to have smaller resolution than the remaining parts of the object.
See also
Distance Overlay
Distance overlay helps identify an optimal scanning distance. It colors surfaces using different colors depending on how close the scanner is to the object (see the table below).
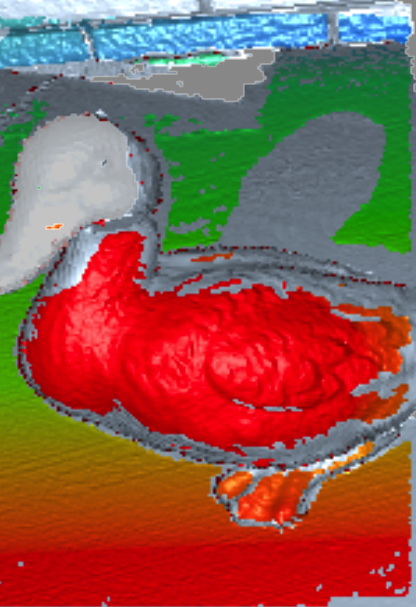
Figure 8 Distance overlay.
Transparent |
Out of the sight |
|---|---|
Red |
0.35 m |
Orange |
0.4 m |
Green |
0.45–0.85 m |
Blue |
1–1.2 m |
Deep blue |
Above 1.2 m |
See also
Target-Assisted Scanning
To perform scanning with targets, a target file with information about the targets to use must first be uploaded into Leo and selected as the default one (see Enable Target-Assisted Scanning for details).
Then follow these steps:
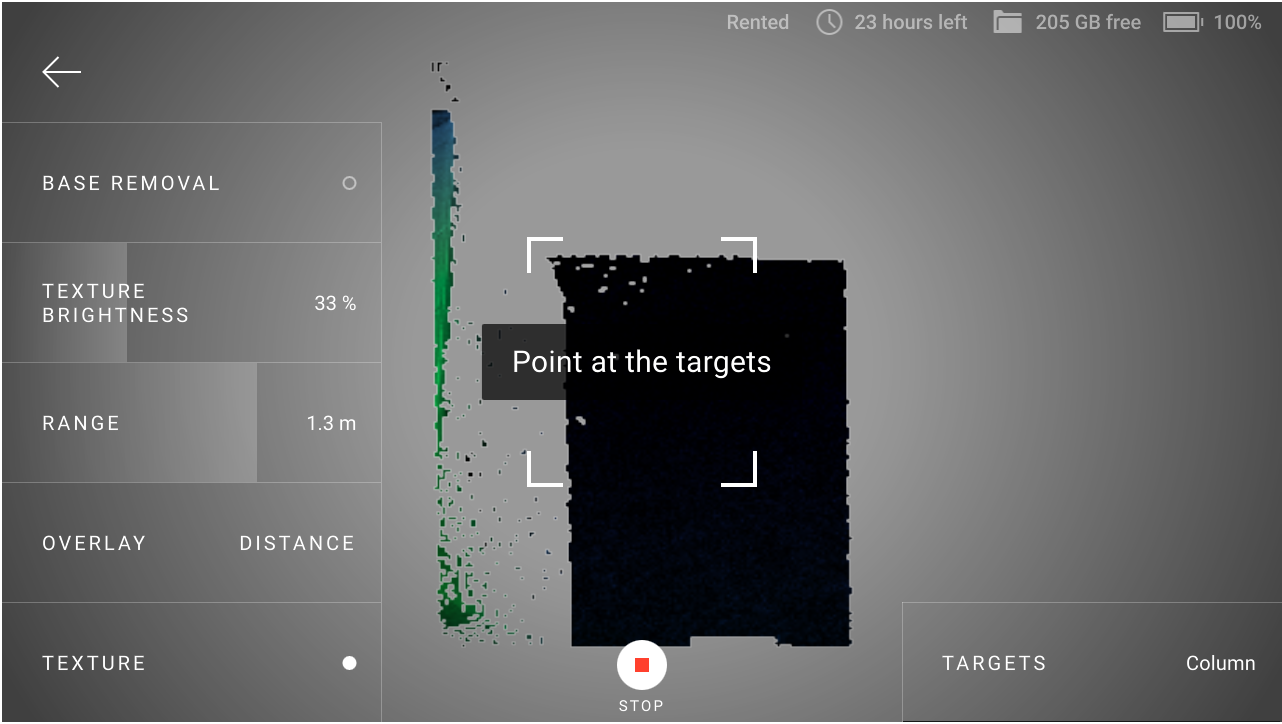
Until Leo does not see the targets from the selected target file in its field of view, its screen will be like the one presented in Figure 9.
Before you start scanning, you can select another target file. To do this, tap Targets at the lower-right corner and then select the desired target file from the list. Select None to not use targets when scanning.
Note
Once the scanning has started, you will no longer be able to change the target file: the Targets button will be locked.
Tap
or press and start scanning.During the scanning process, the target marks should be visible on the screen, as they were on the preview screen (Figure 10). If Leo does not see the targets in its field of view, then the tracking will be lost, the recording will be interrupted and the warning Point at the scanned area will be displayed.
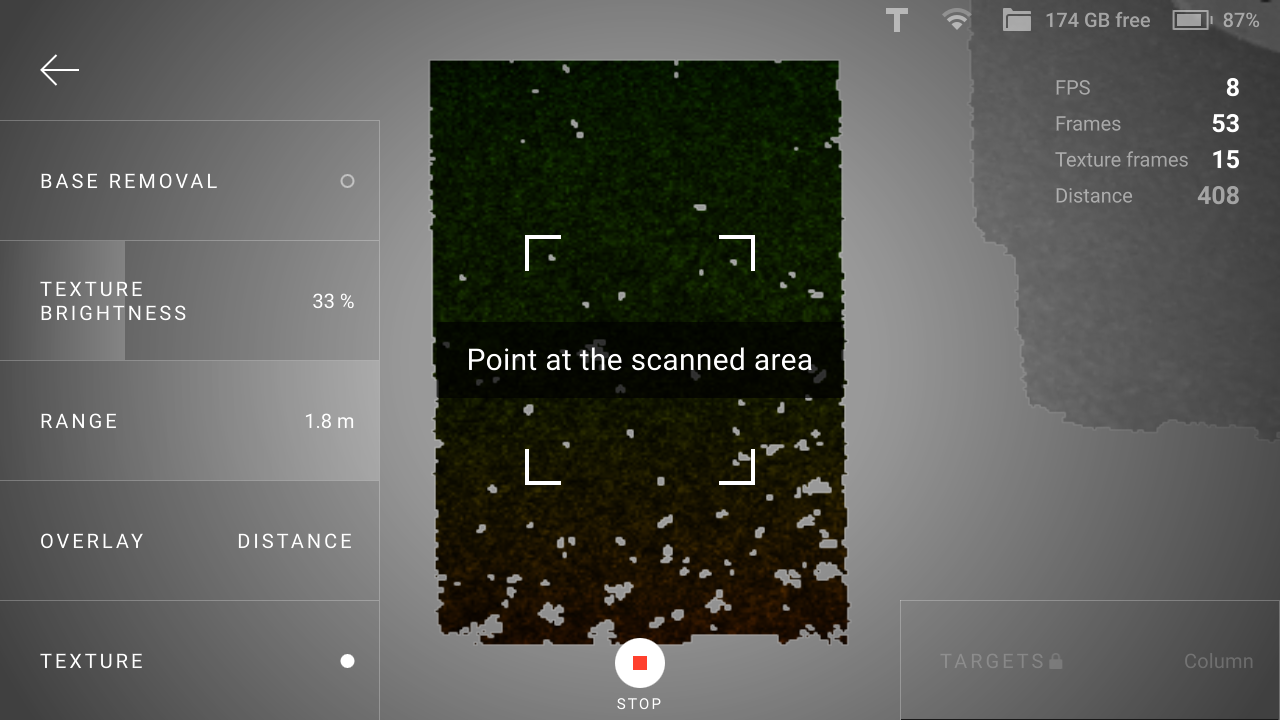
Figure 11 Leo has lost tracking when scanning with targets.
If the tracking is lost, you can do one of the following:
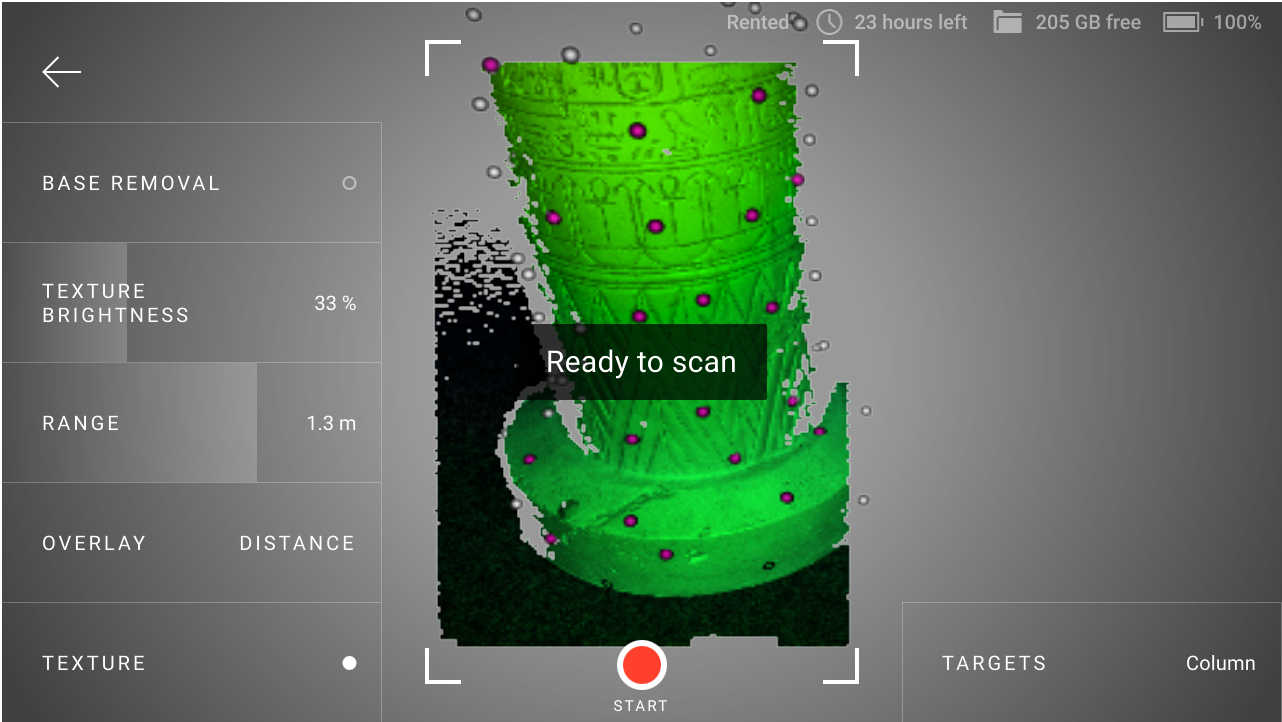
Point the scanner at the targets again. When Leo recognizes the targets, its screen will be like the one presented in the figure below and you can continue scanning.
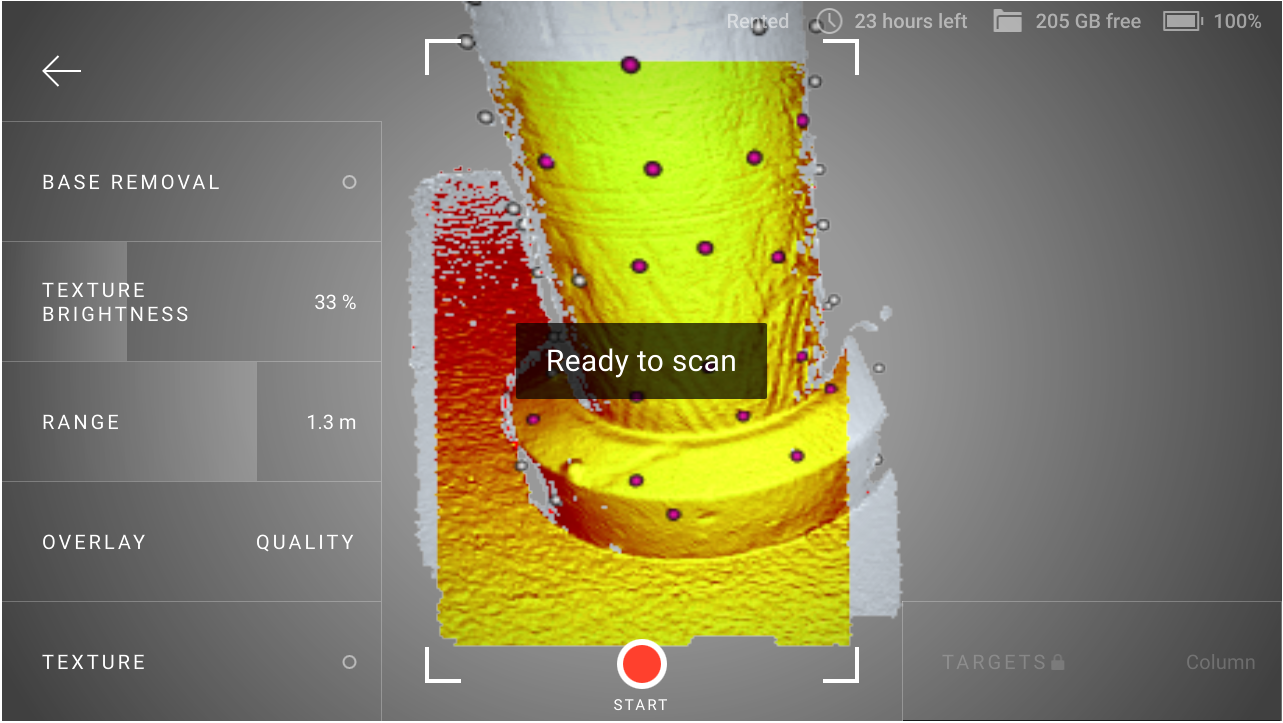
Figure 12 Leo has recognized the targets and is ready to continue scanning.
Tap
or press to stop scanning.