Getting Started
Conventions and Acronyms
The information in this User Guide appears highlighted variously. E.g., important information appears in boxes. The following examples illustrate document conventions:
Note
General information that needs to be emphasized.
Important
Important information.
Warning
Practices to be avoided.
Panel and element names in the application window use italics: e.g., Model, Scan panel.
Buttons, checkboxes and elements of the dropdown lists on panels and in application menus appear italicized and underlined: Pause, OK and so on
Shortcuts, individual keys and hardware buttons are grayed out—e.g.,
Cmd + QCharacters that user types in various fields, file extensions, directrory and file pathes are marked up in the following way:
Scan 1,SPROJ,C:\Program Files, etc.
Rememeber the following abbreviations and pictograms:
LMB—left mouse buttonRMB—right mouse button —Play/Pause button on the scanner body
Glossary
There are some common terms related to ScanApp™ and 3D scanning that may be useful for you.
- frames
- 3D surfaces captured by the scanner during a scanning session. The maximum scanning rate is up to 15 frames per second
- mesh
- The surface geometry of a 3D model made up of a series of linked polygons.
- model
- The 3D object obtained as the result of the Model creation operation (in ScanApp™) or any different modeling process in other software packages.
- preview
- Scanning mode when the ScanApp™ reconstructs surfaces but doesn’t store them in a scan.
- scan
- A sequence of frames captured in a single continuous movement of the scanner around an object or scene.
- tracking
- Calculating the scanner’s position in the coordinate system relative to the scene.
Requirements
Getting started with ScanApp™ is easy. Ensure you have the following:
- Mac computer
- featuring either a discrete graphics card or an integrated graphics processor (at least Intel HD Graphics 5300)
- running either OS X El Capitan or Yosemite
Account at my.artec3d
Artec EVA scanner assigned to your account at my.artec3d
Important
ScanApp™ doesn’t support Artec Spider scanner.
Installation
- Download the
*.dmgfile from my.artec3d and double-click it - Drag and drop the ScanApp™ icon into the Application folder alias, as Fig. 1 shows
- In the window that appears, click Open
- Plug the scanner into a power outlet, then connect it to your Mac using the USB cable
- Start the application
- Click Identify Scanner
- Enter your credentials for your my.artec3d account and click Sync
- Once the application downloads the required files, the
 icon (Connected) will appear in the upper left corner. At that point you can start scanning.
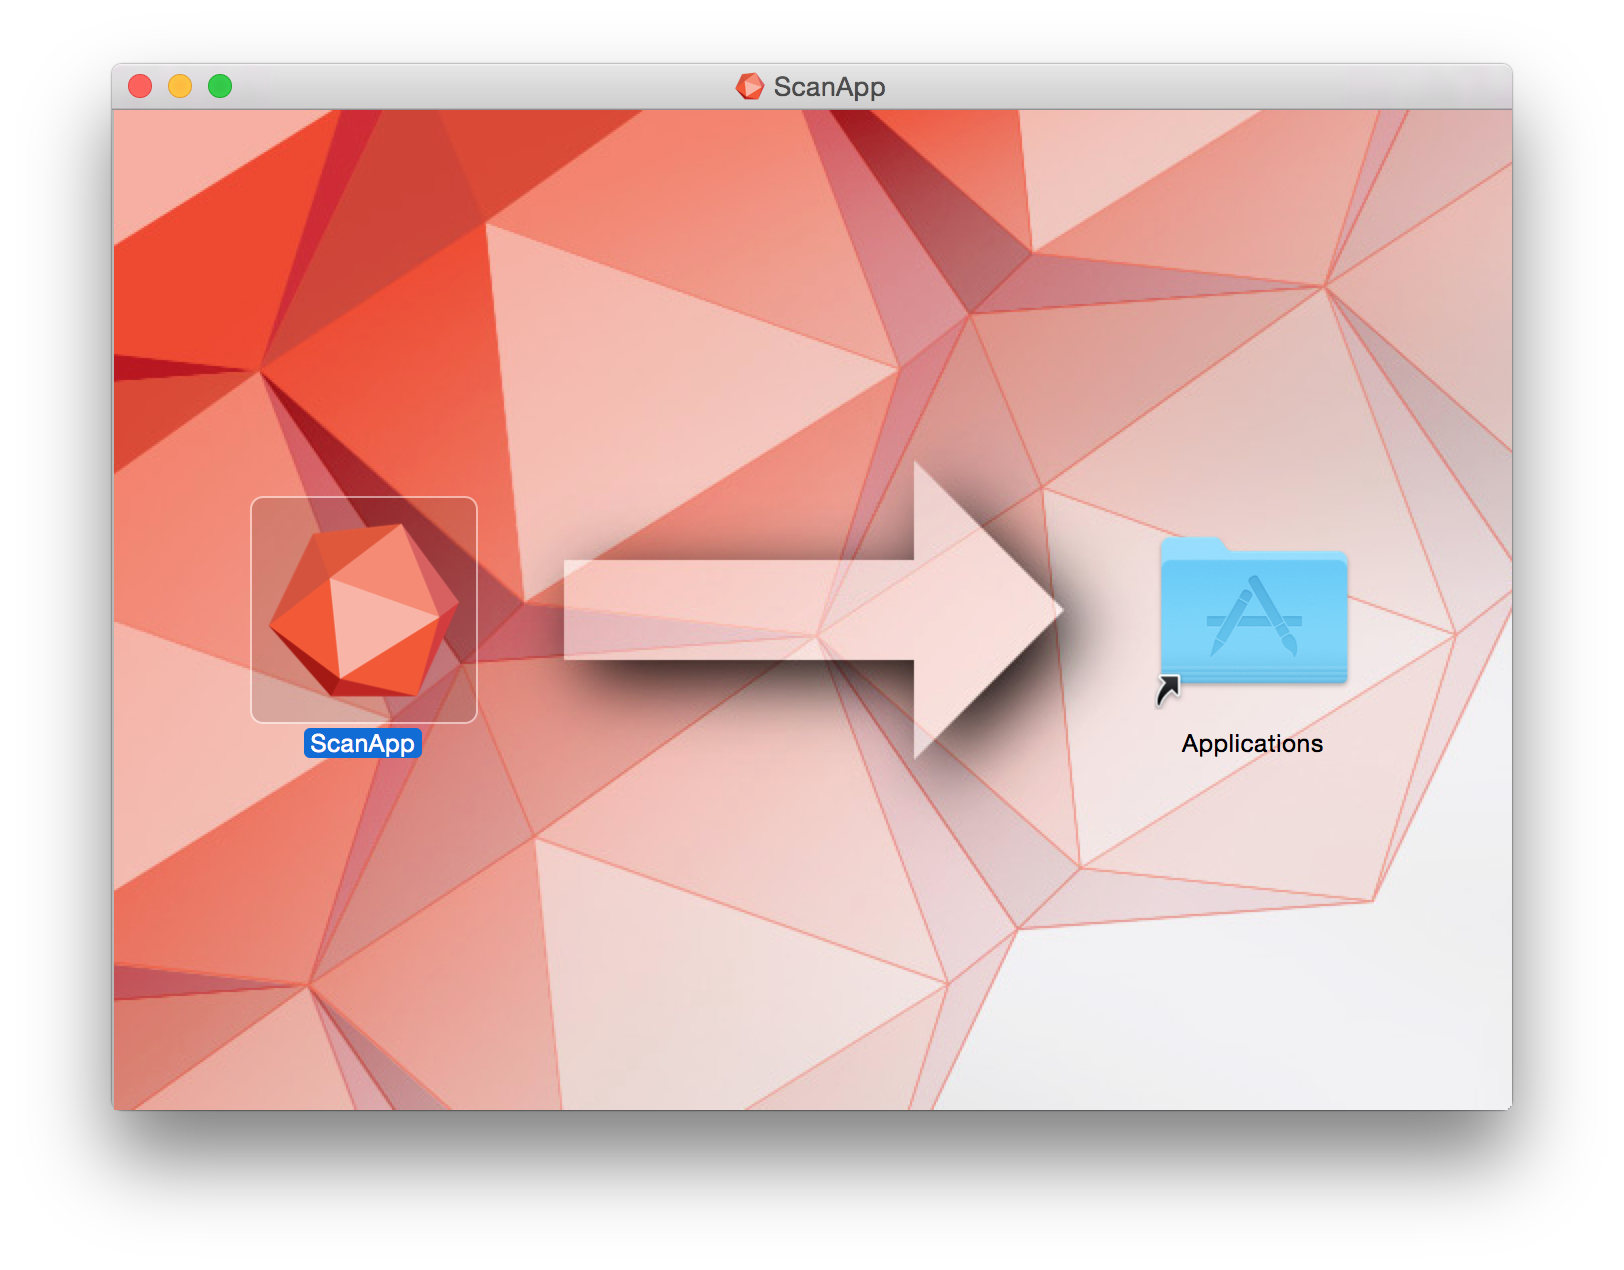
Fig. 1 Installing ScanApp™.
Troubleshooting
If the application failed to detect a scanner, check the following:
- Make sure the Artec EVA scanner that you’re trying to connect is listed in the My scanners sections at your my.artec3d page
- Ensure that the USB cable is properly attached between your Artec EVA and computer
- Click the Click to Reconnect button in the upper left corner of ScanApp™ window
Application Overview
ScanApp™ features an ergonomic interface which enables you to scan, process and analyze scans. Application window is divided as the Fig. 2 shows.
- 3D View
- Scan panel
- Upper and lower status bars
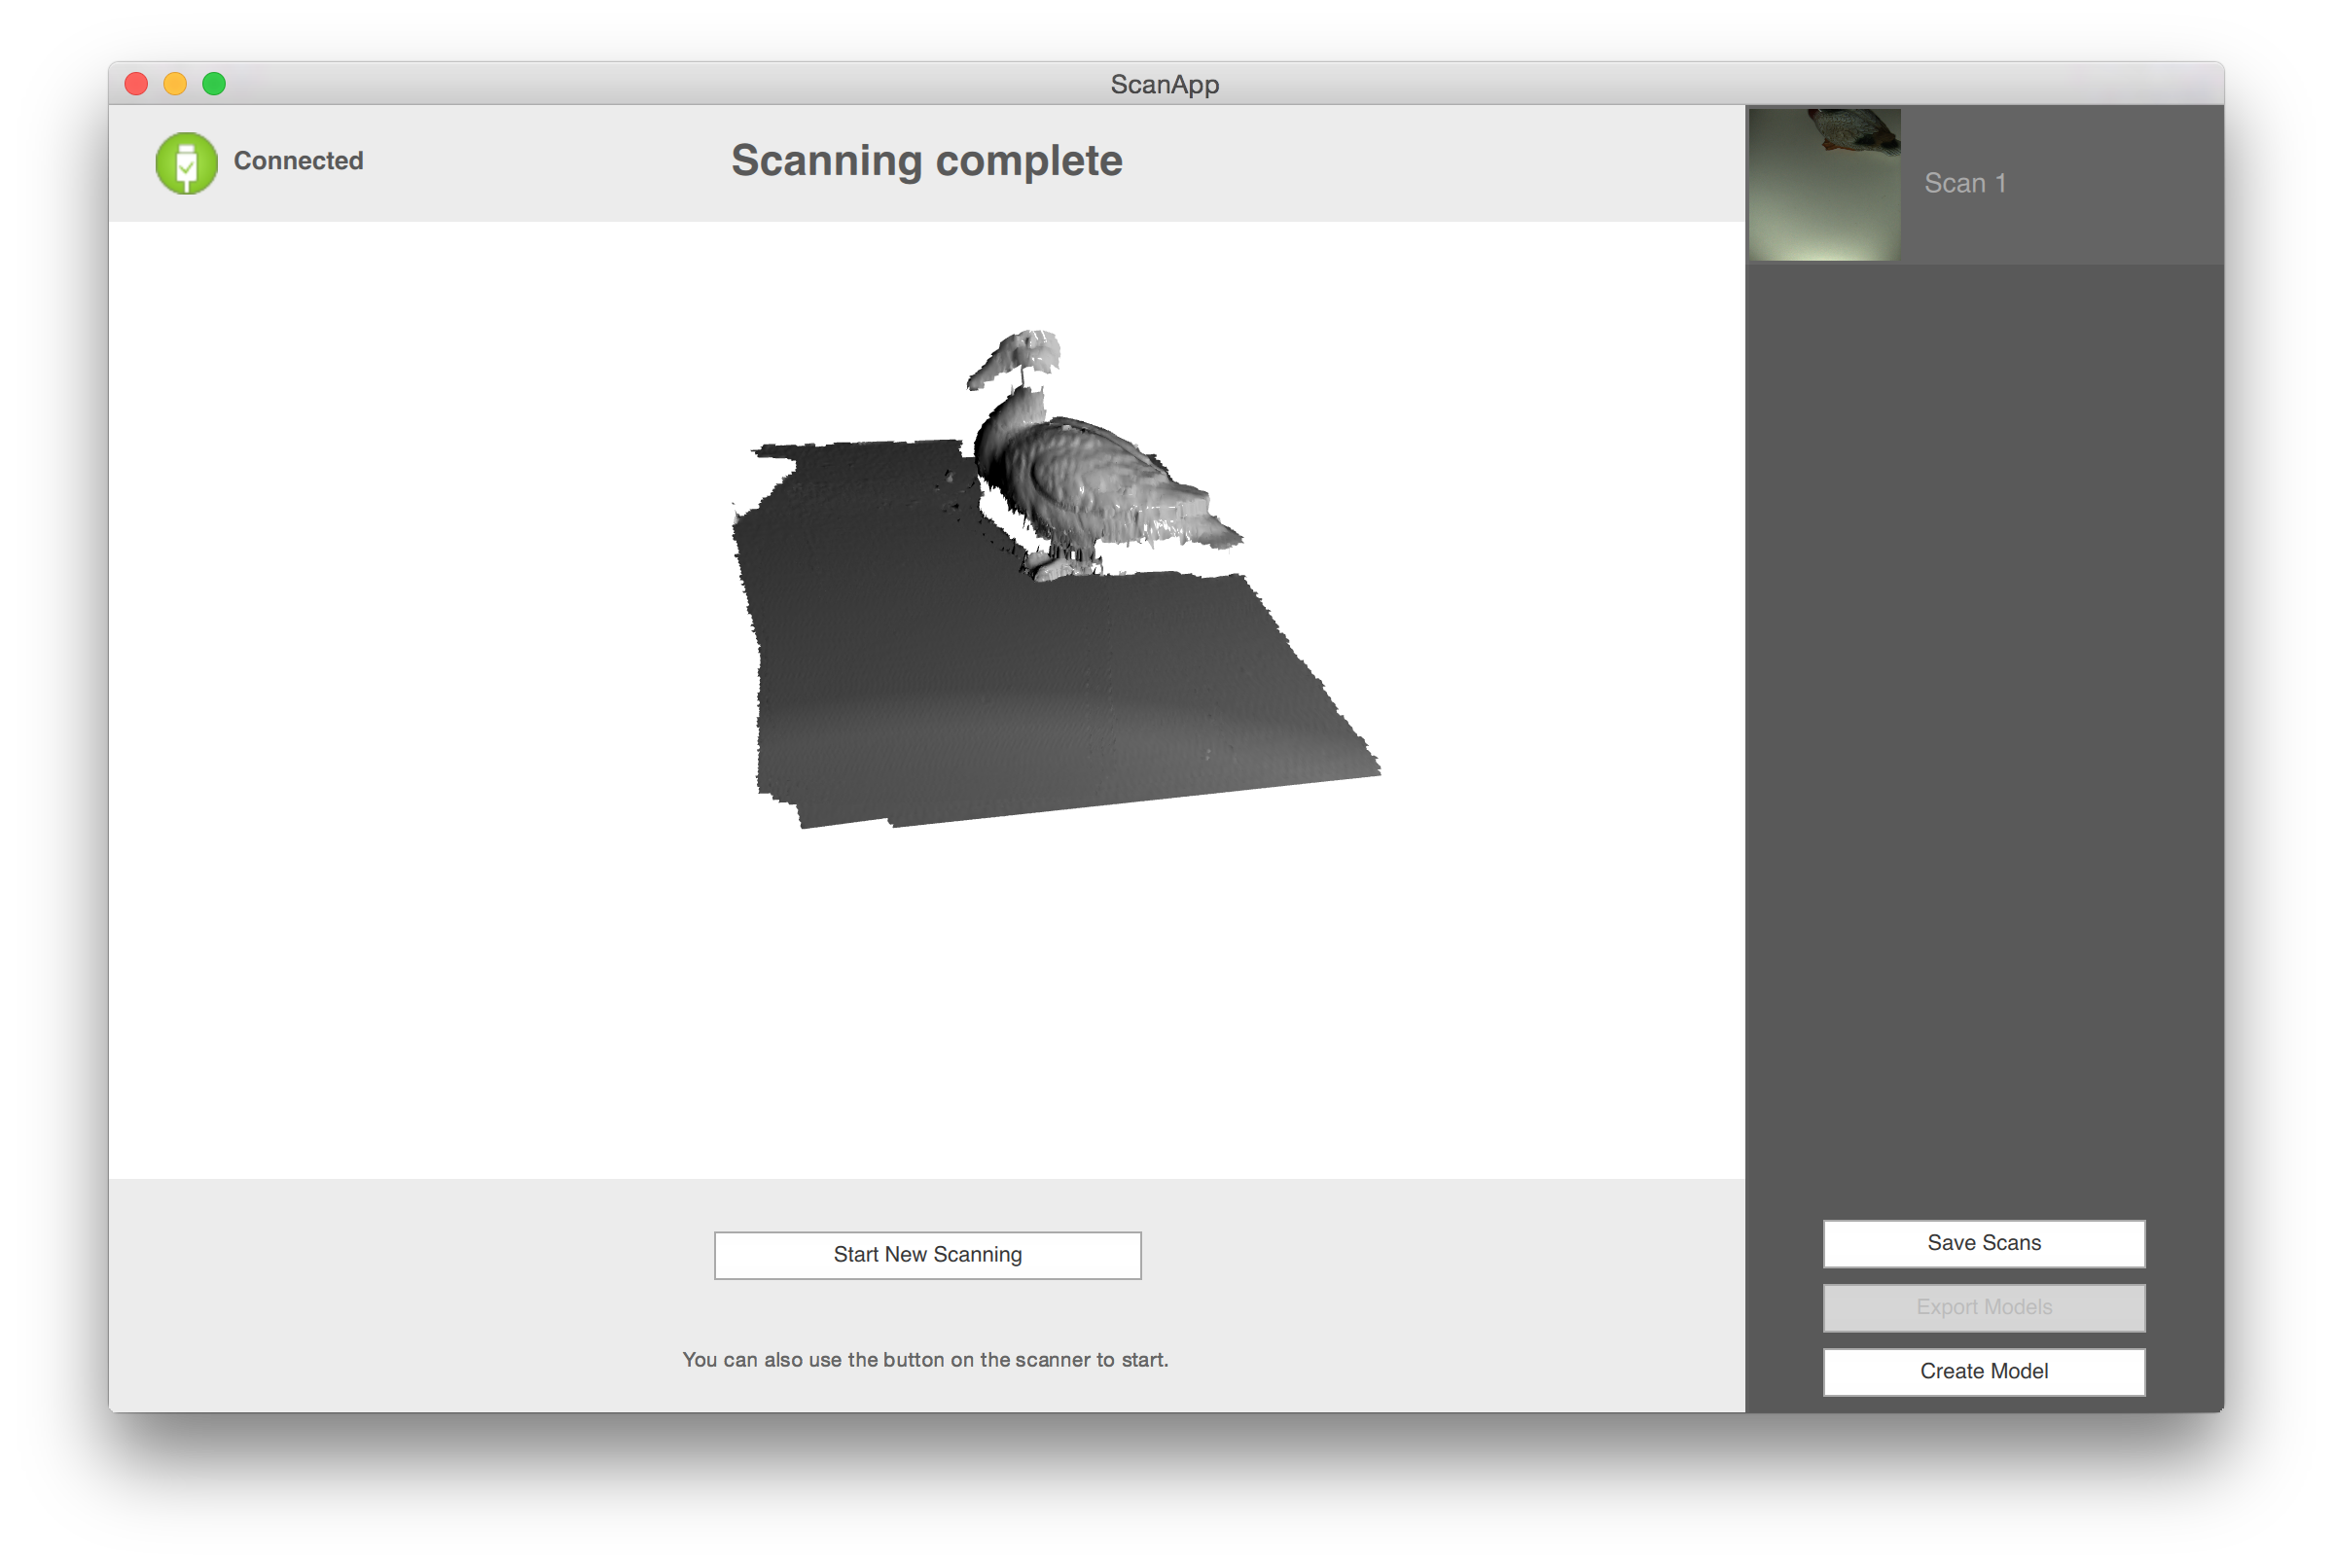
Fig. 2 Main window of ScanApp™: 3D View in the middle, Scan panel (dark gray) on the right.