Scanning with the Artec Remote app
To scan using Artec Remote app, follow these steps:
- Install Artec Remote app on your iPhone/iPad.
- Launch Artec Remote app.
- Connect to Ray via Wi-Fi.
- Make a Preview scan.
- Mark particular selections if necessary.
- Configure scan settings.
- Scan the object from the chosen viewpoint.
Install Artec Remote app
![]()
![]()
To find and install the Artec Remote application in App Store, follow these steps.
- Launch the App Store.
- Tap the magnifying icon on the bottom right of your screen.
- Type in your search query
Artec Rayand tap the Search button. - Wait for the download to finish.
Launch Artec Remote app
Once the Artec Remote app installation is complete, it will appear on your Home screen. Tap it to open and begin using.
Connect to Artec Ray via Wi-Fi
The first thing you need to do is connect to Ray. To connect from your iPhone/iPad to Artec Ray via Wi-Fi, follow this steps.
- Launch the Artec Remote app.
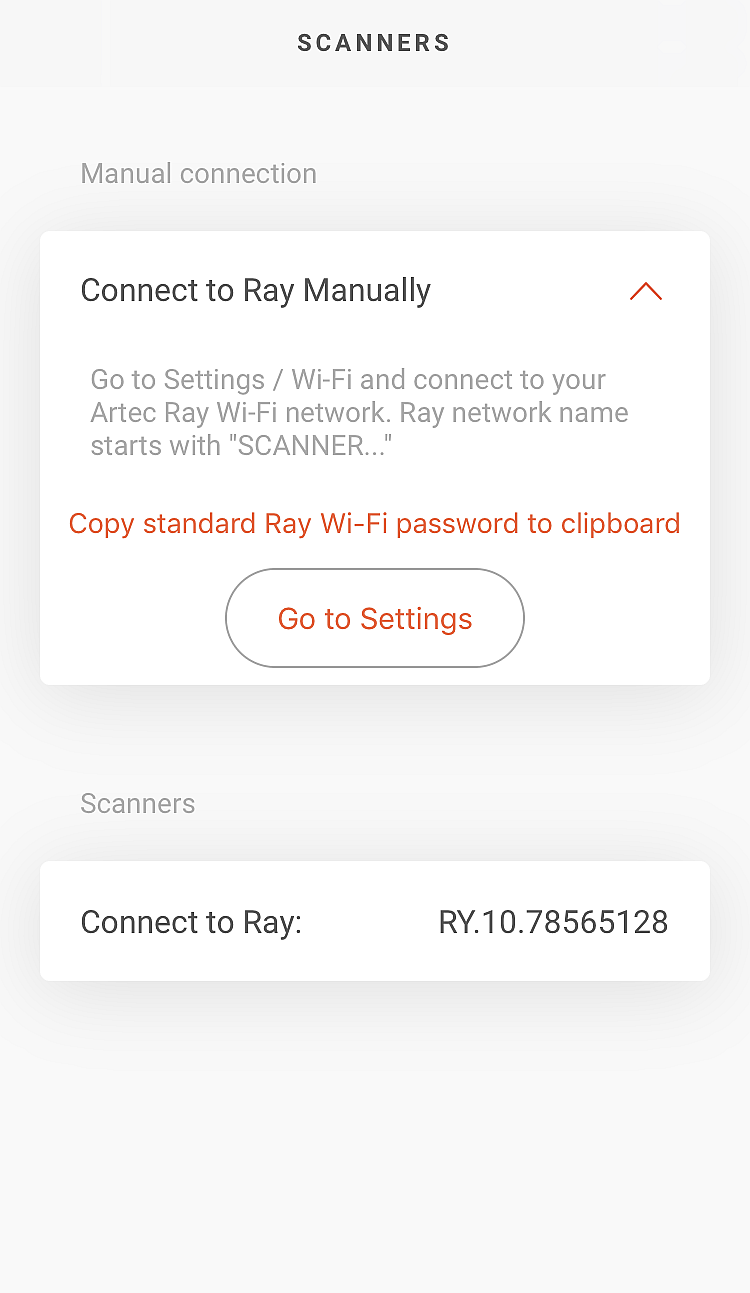
Figure 9 Scanners screen.
- In the Scanners screen tap Connect to Ray Mannualy button.
- Tap Copy standard Ray Wi-Fi password to clipboard label to copy Artec Ray connection password to clipboard.
- Tap Join in the Ray Wi-Fi hotspot notification window
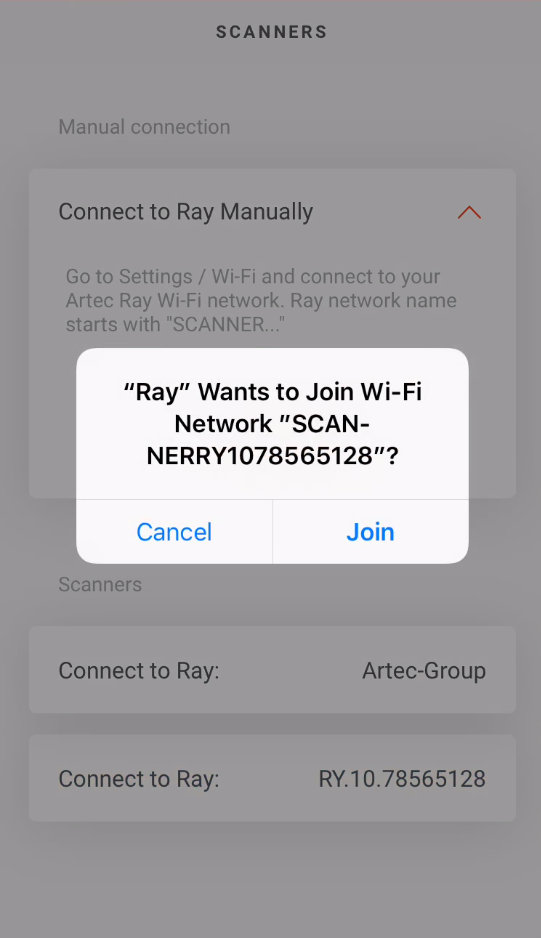
Figure 10 Ray Wi-Fi search.
- If you need to set another Ray, tap Go to settings button.
- In the Wi-Fi settings screen, find and connect the preferred Artec Ray network with the copied password. Ray hotspot network name starts with
SCANNER....
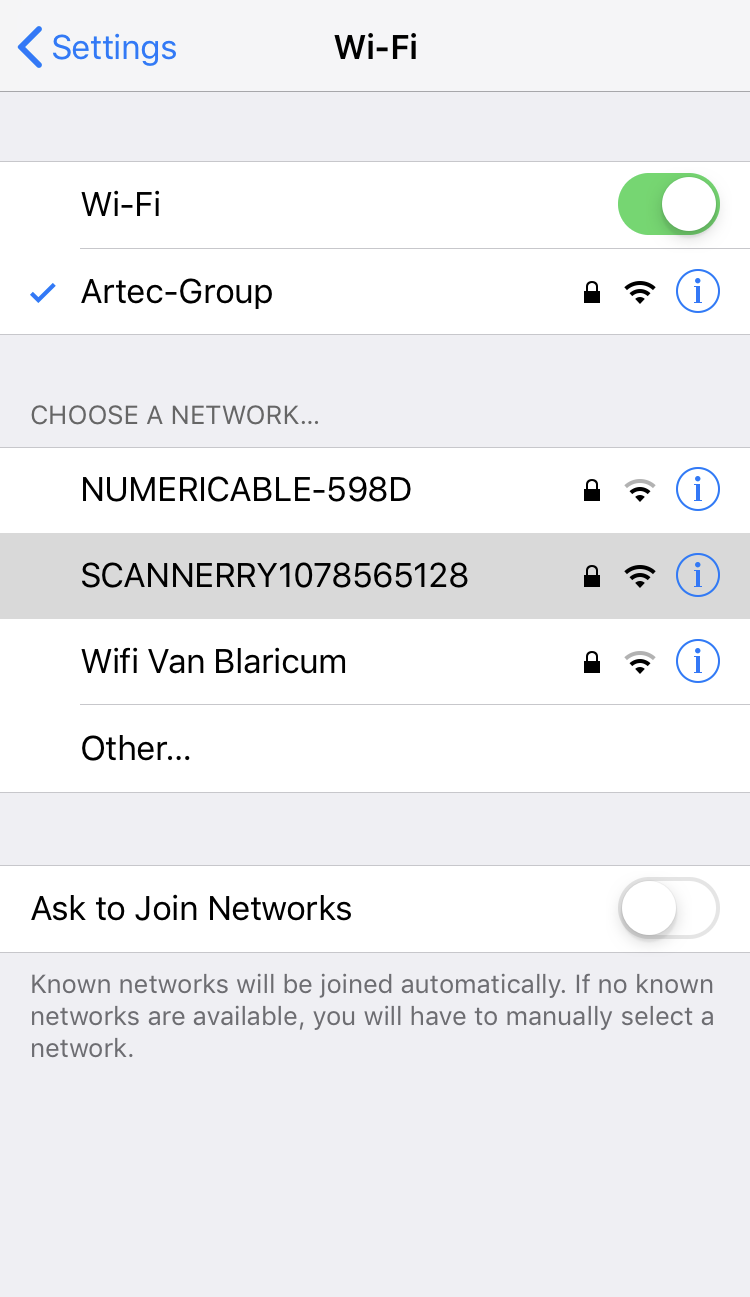
Figure 11 Ray Wi-Fi search.
- After this, return to the Artec Remote app main screen and tap Connect to Ray button.
Preview Scan
Initial preview is intended to obtain a low-resolution image of the premises or other areas where you can make out the desired object. Another purpose of a preview scan is to estimate the required point density. If you need a full scan and you understand the way the parameters work, you may skip preview (see Preview Scan).
To make a preview, follow the steps:
- Connect to Ray via Wi-Fi.
- Open the Artec Remote app main screen.
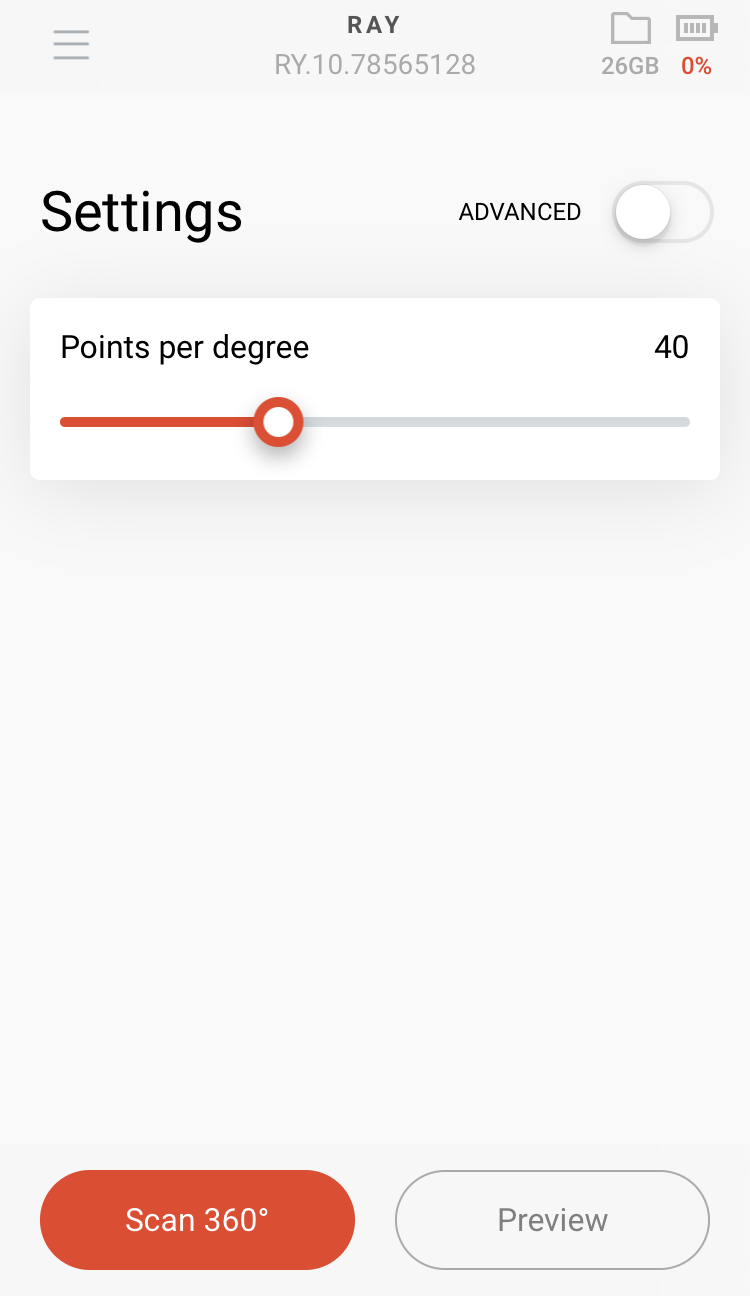
Figure 12 Main screen.
- Tap Preview button. Artec Ray will start making a preview.
- The window will split into two panels and each of them will start filling with the scanned data.
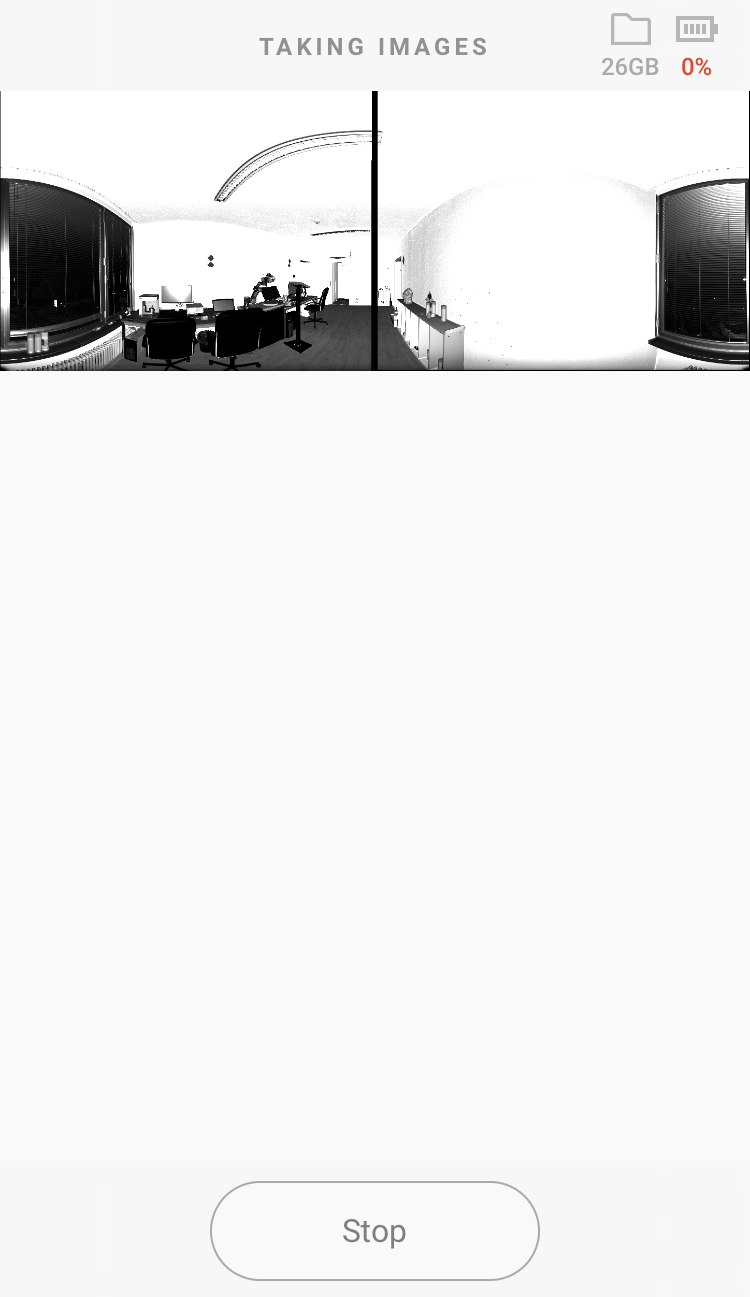
Figure 13 Making preview.
- When the preview is complete, scanned low-resolution data appears in the main window.
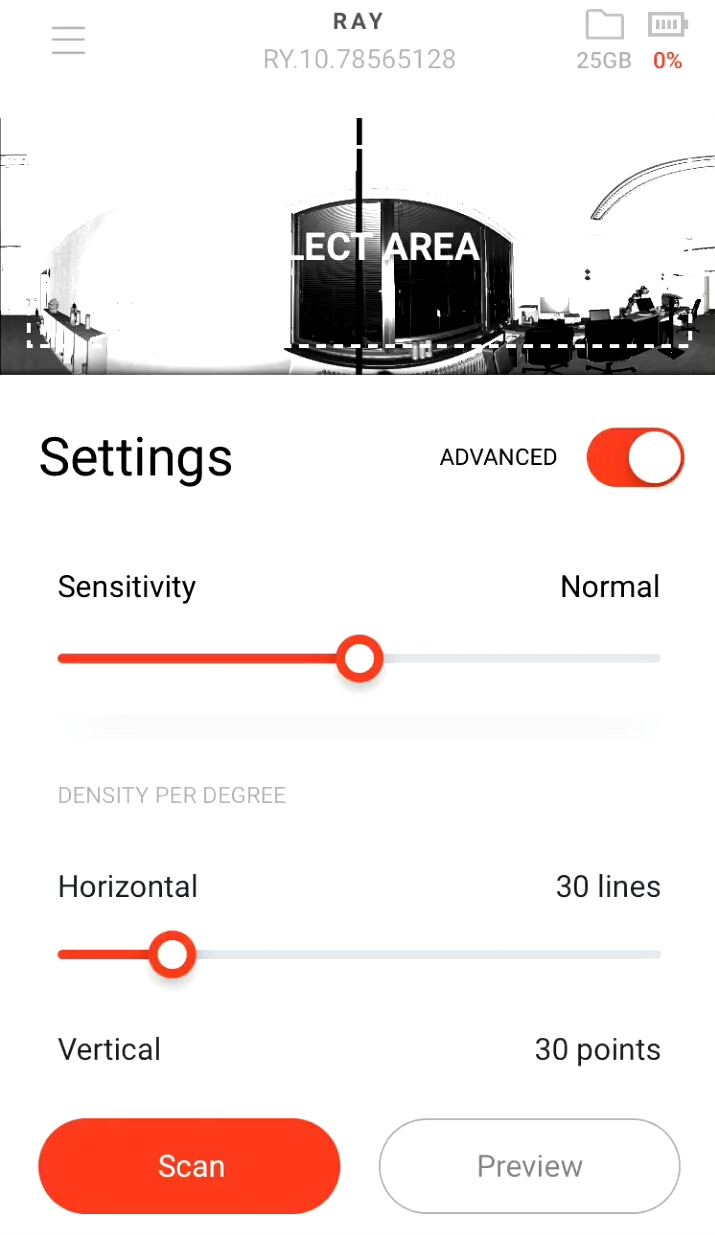
Figure 14 Previewing scan data.
Once the preview of unwrapped 3D data is ready, you can examine particular regions.
Mark Sections
With a ready preview, you can perform either of the following actions:
- Select the entire preview image to scan the whole space.
- Locate and mark sections to scan particular objects in this scene.
To start selecting sections, swipe right the main window with preview image.
Important
If you scan with targets, ensure that you have marked the sections with these targets.
Use the following buttons to control selections:
 |
Select the entire preview image |
 |
Select (add) a rectangular section |
 |
Select (add) a custom section |
 |
Subtract a custom section |
 |
Subtract a rectangular section |
 |
Clear all selected sections |
Mark the entire preview image
To mark the entire preview image, tap  button
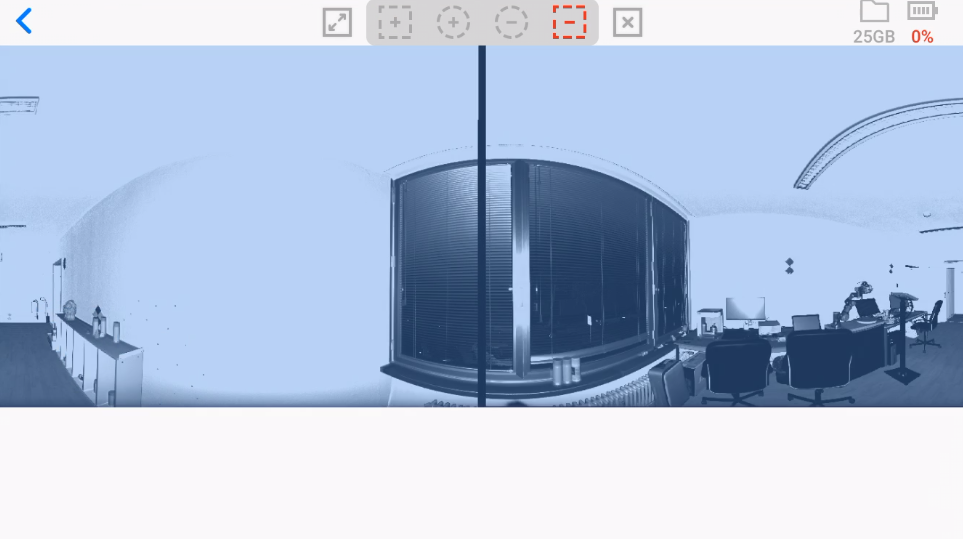
Figure 15 Marking entire preview image.
Mark the rectangular selection
To mark the rectangular selection, tap  button. Then tap the area in the preview image.

Figure 16 Marking rectangular selection.
Tap and hold to start drawing your rectangle. The rectangle extends both horizontally and vertically from there while covering a selected area. To save the selection, release the finger off the screen.
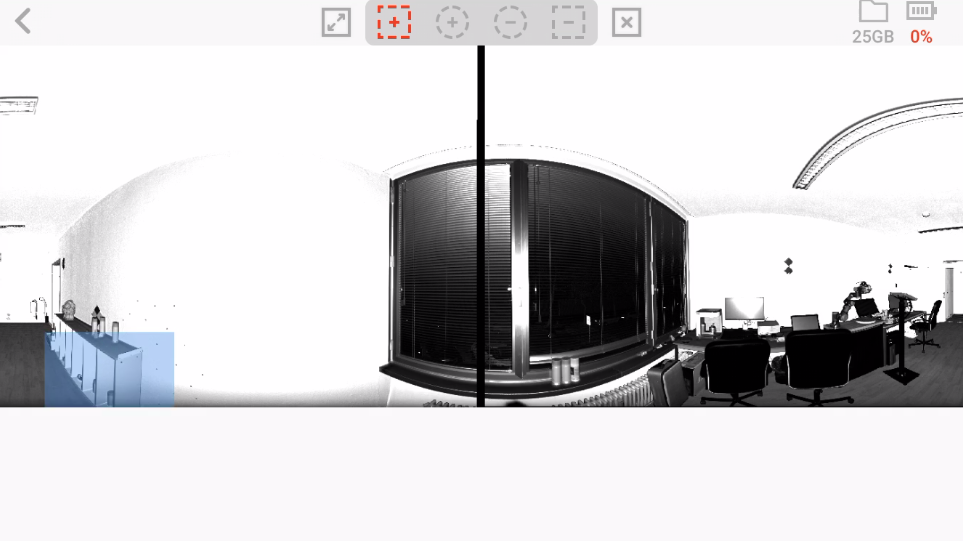
Figure 17 Saving rectangular selection.
Delete the rectangular selection
To mark the deleting rectangular selection, tap  button. Then tap the area in the preview image.
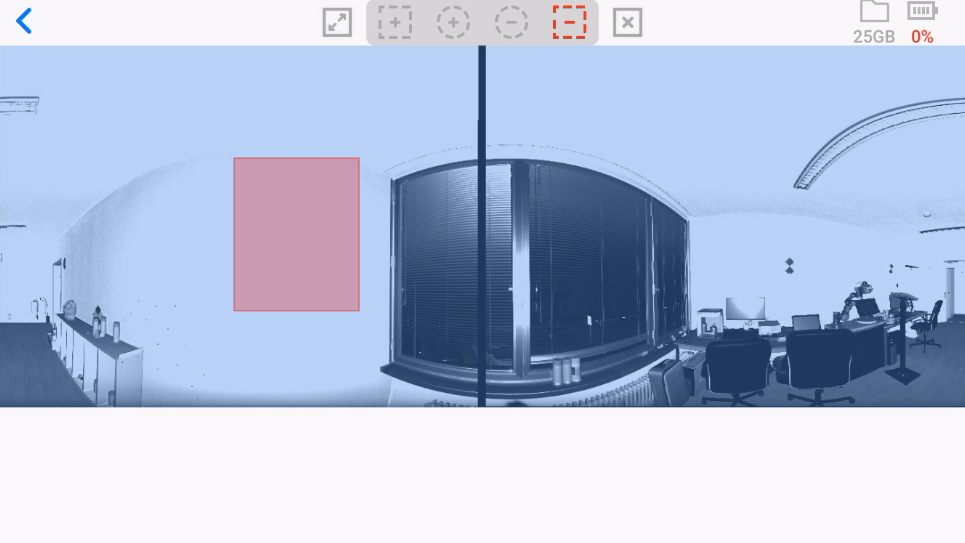
Figure 18 Marking rectangular selection to delete.
Tap and hold to start drawing your rectangle. The rectangle extends both horizontally and vertically from there while covering an area to delete. To delete the selection, release the finger off the screen.
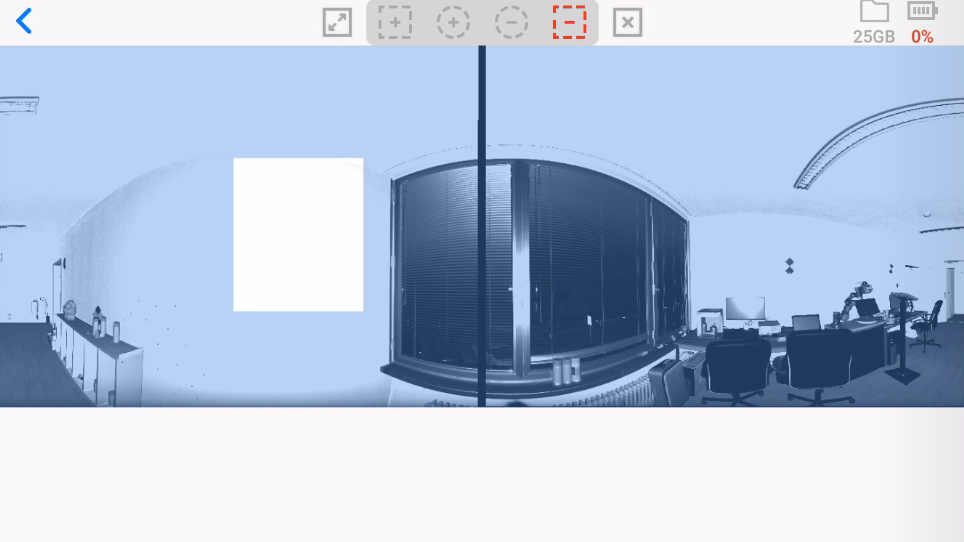
Figure 19 Deleting rectangular selection.
Mark the custom selection
To mark the objects within a complex or irregular region, tap  button. Then tap the area in the preview image.
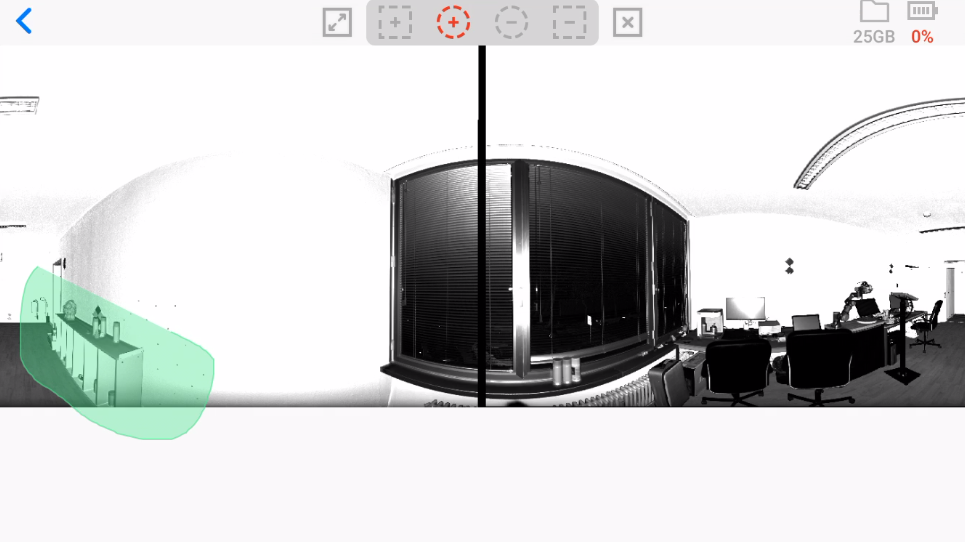
Figure 20 Marking custom selection.
Tap and hold to start drawing your custom selection region. Drag the selection to cover the area needed. To save the selection, release the finger off the screen.
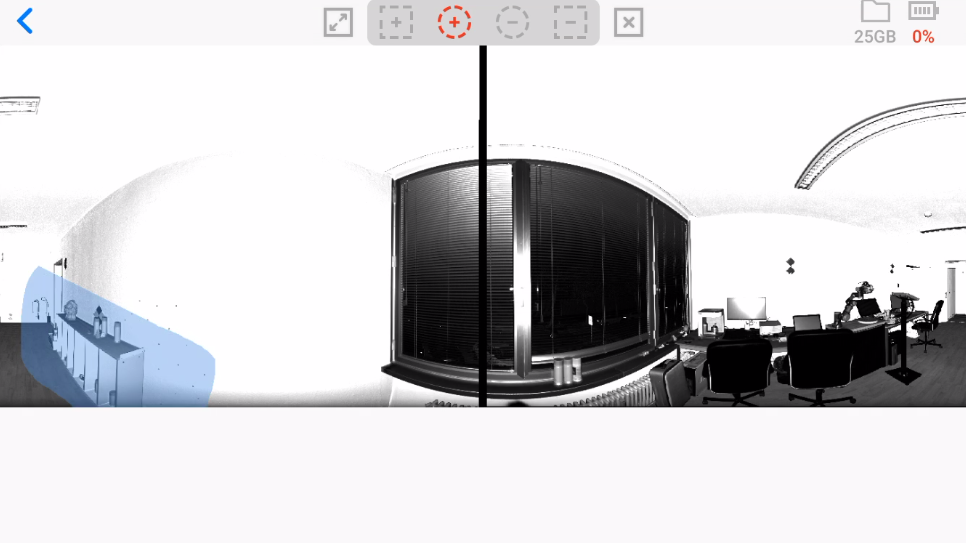
Figure 21 Saving custom selection.
Delete the custom selection
To mark the deleting custom selection, tap  button. Then tap the area in the preview image.
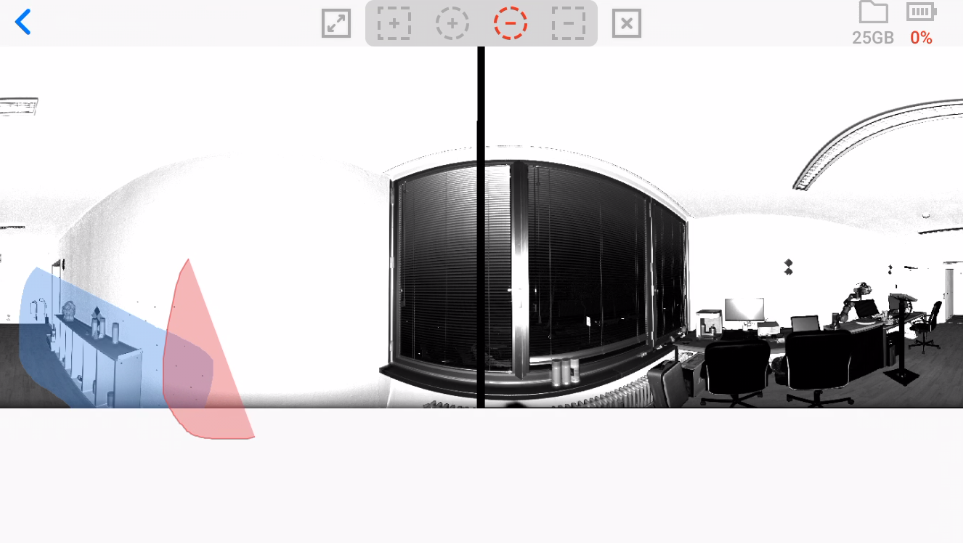
Figure 22 Marking custom selection to delete.
Tap and hold to start drawing your deleting region. Drag the selection to cover the deleted area. To delete the selection, release the finger off the screen.

Figure 23 Deleting custom selection.
Cancel selection
To cancel selection, tap  button.
Scan configuration
Configure point density
Scan configuration window is shown below:
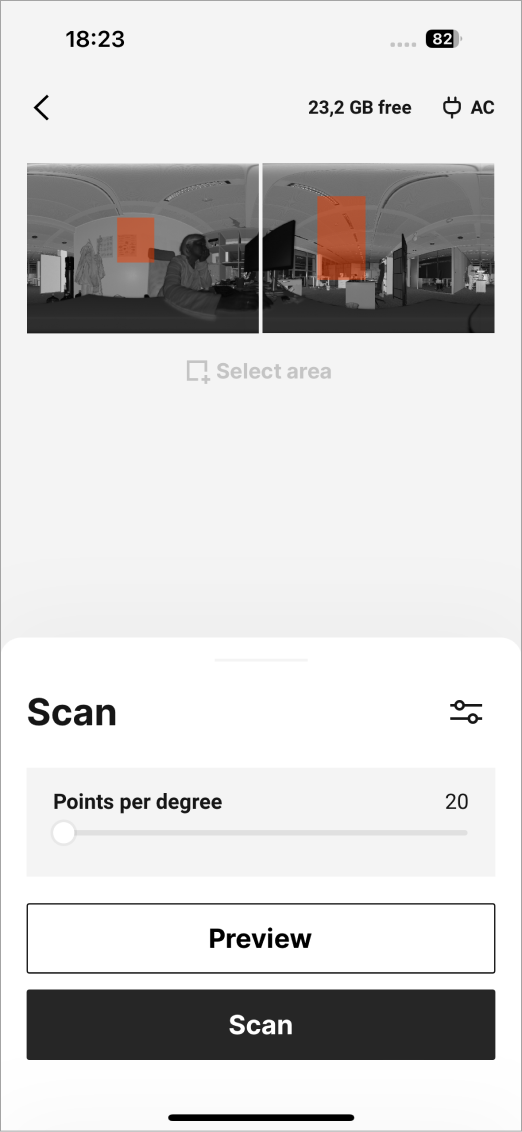
Figure 24 Setting basic scan resolution.
Points per degree is 3D scan resolution. Available values range is 20–80. The larger the value, the better the resolution and the longer the scanning time will be. Estimate and adjust point density on different distances.
To ensure that a particular surface is duly scanned, do the following:
- Start a preview.
- Increase density level by the Points per degree slider if you need a better resolution for distant objects.
Advanced configuration
To reveal more settings in Artec Remote app, enter the Advanced mode using the eponymous toggle.
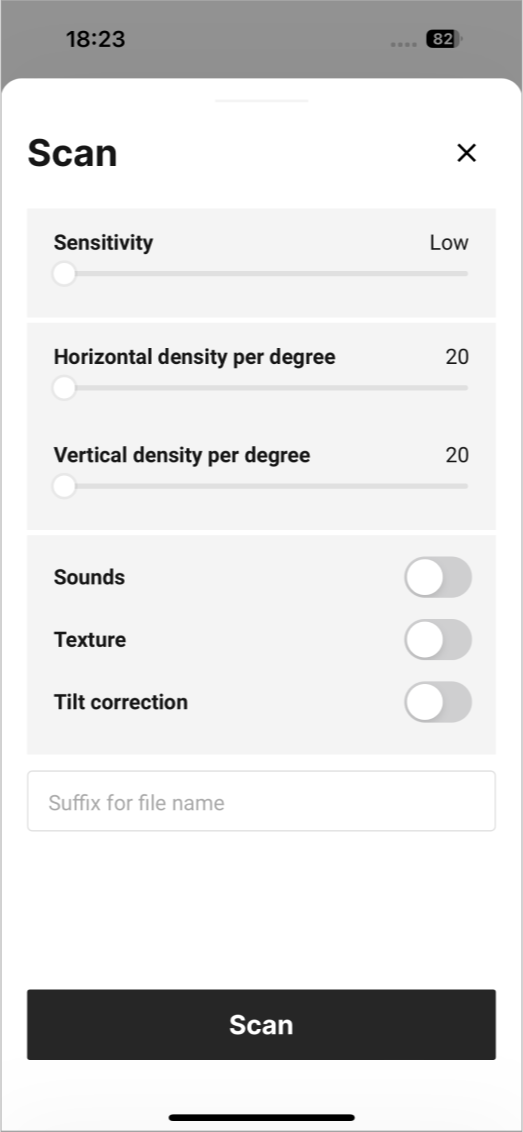
Figure 25 Advanced settings window.
Sensitivity has Low, Normal and High values.
- Low is a regular mode balanced in terms of accuracy and noise level.
- Normal is a default mode.
- High was designed to scan either far or hard-to-scan objects.
Density
- Horizontal is a number of points per horizontal degree. The range is 20–80.
- Vertical is a number of vertical lines per degree. The range is 20–80.
- Texture toggles the texture recording texture (color).
- Sounds toggles the audio notifications during scanning. This indicator may be helpful to monitor scan progress.
Scanning
Ray has following scan modes:
Full scan - If you need to scan the whole area without preview
Particular scan - If you have marked the selected regions in a preview image
Important
Full scan is a default mode. It performs by the Scan 360° button. If you make a preview and mark selections, this button is changed to Scan and performs a particular scan.
Adjust the point density using the Points per degree slider and other parameters as necessary. To start a scan, tap Scan 360° or Scan button.

Figure 26 Scanning in progress.
You can control Artec Ray battery level and SD-card free space using the icons in the top left of the application window:
 |
Artec Ray SD-card unused space size (GB) |
 |
Current battery level |
To cancel the scanning, tap the Stop button.