Software Installation
To get access to comprehensive functionality and settings of the scanner via USB or Wi-Fi connection, you should install appropriate software:
Artec Studio is to control scanning with a PC via USB connection; and
Artec Remote is to control scanning with mobile devices (iOS or Android) via Wi-Fi.
Artec Studio
Open my.artec3d and download Artec Installation Center
Install Artec Installation Center on your computer and launch it
Download Artec Studio
Install Artec Studio as Artec Studio manual suggests.
Once you’re done, you can proceed to the preparation of the location and objects to be scanned.
Artec Remote
Follow one of the links below that correspond to your mobile platform and install the Artec Remote app.
![]()
![]()
If for some reason the links do not work, try to find the application yourself in a corresponding app store.
To find and install the Artec Remote app in App Store, follow these steps.
Launch the App Store on your device.
Tap the magnifying icon on the bottom right of your screen.
Type in your search query
Artec Remoteand tap the Search button.Select “Artec Remote” from the provided app list.
Tap the Download button and wait for the download to finish.
To find and install the Artec Remote app in Google Play, follow these steps.
Launch the Google Play on your device.
Type in your search query
Artec Remoteat the top of the screen and tap the search button.
Select “Artec Remote” from the provided app list.
Tap the Install button and wait for the download to finish.
Launch Artec Remote app
Once the Artec Remote app installation is complete, it will appear on your Home screen. Tap it to open and begin using.
Using the Artec Remote app, you can easily scan large object with Ray, without being tethered to a computer. The scanning process can be controlled by any mobile device or tablet via WiFi.
Apart from this, the latest version of the app also enables you to log in to your MyArtec account directly, or via social networks. Logging is open up many features, for instance, you can:
Overview all your Artec scanners and software, and access their information anytime.
Directly select a Ray scanner from your list and connect to it for scanning.
Request to reset your MyArtec password, if you forget it.
Ask for instant help from our support team, by creating and sending us a request.
Contact us with any ideas or suggestions about any of our products.
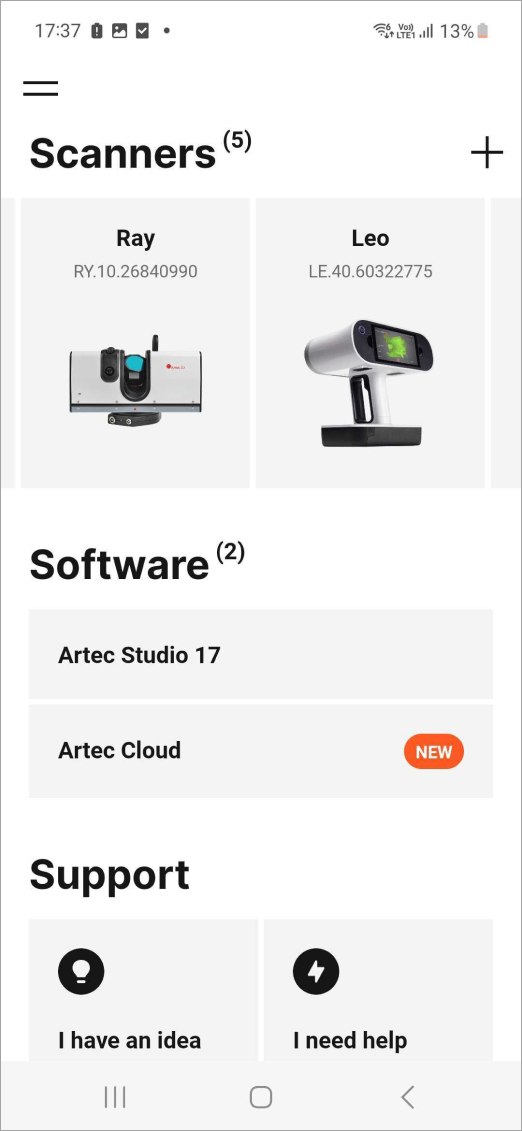
Figure 3 MyArtec home-screen after logging in.
Connect to Artec Ray via Wi-Fi
Important
Make sure you have disconnected the USB cable from the scanner to use Ray over Wi-Fi. Otherwise, Wi-Fi connection will be unavailable.
The first thing you need to do is connect to Ray. To connect from your iOS or Android device to Artec Ray via Wi-Fi, follow these steps:
Launch the Artec Remote app.
To connect to a Ray scanner, simply tap the Connect to Ray button
Connect to the scanner’s Wi-Fi network via your device’s network settings.
To manually connect a Ray scanner for the first time, follow the instructions for Manual connection displayed on the app.
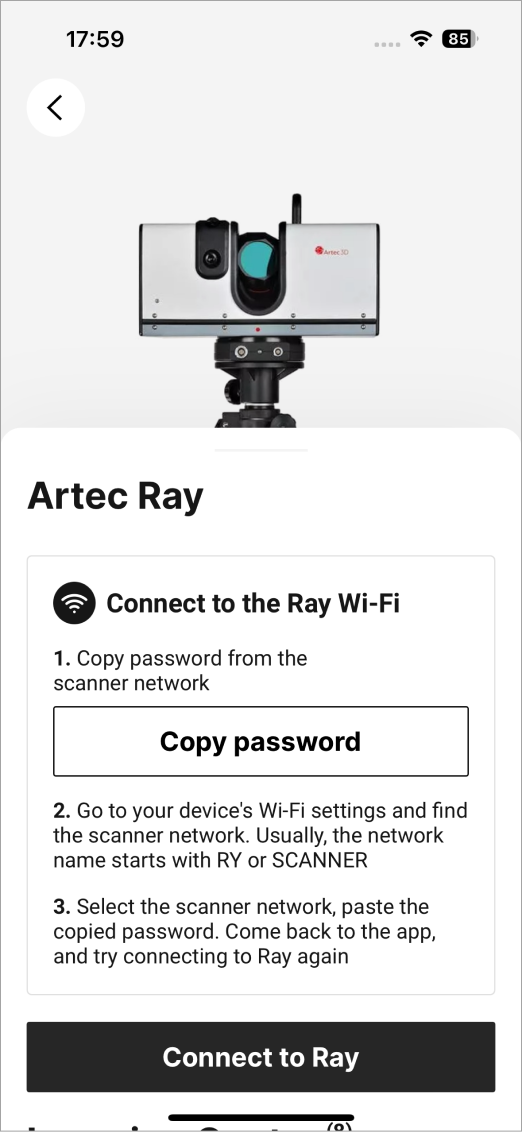
Figure 4 Connect to ray via Wi-Fi, manually.
If a Ray has already been connected, you can select the Ray shown in the bottom sheet by tapping Connect to Ray button, and then wait for the app to connect to the scanner.
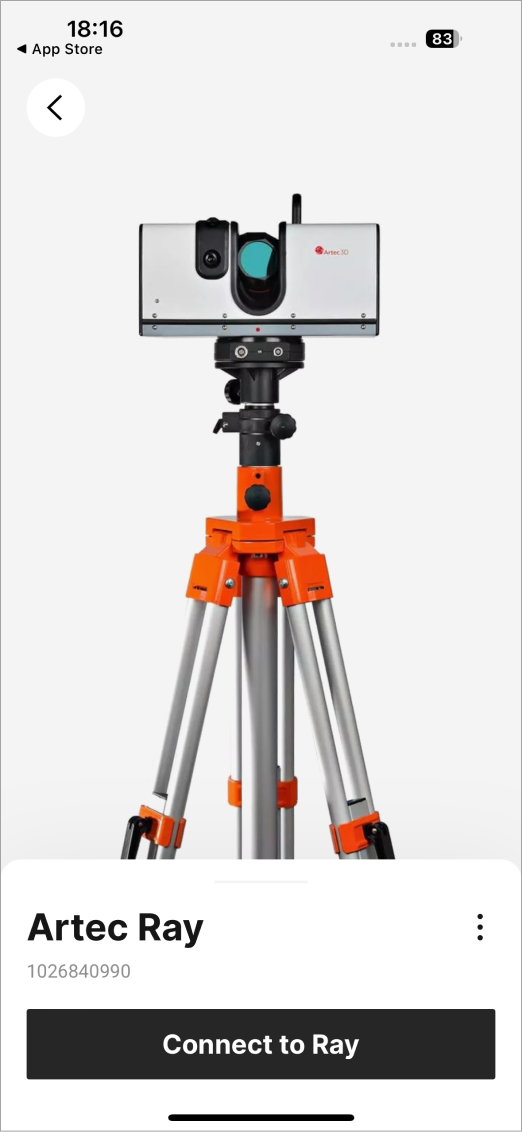
Figure 5 Connect to your last connected Ray automatically.
Note
To ensure proper functioning of the app, grant all required permissions, when prompted.
You can also log in to your MyArtec account using the Log in button, and connect to Ray from your list of scanners.(See more Launch Artec Remote app ).
After successful connection, the app will be ready for operation.
Launch the Artec Remote app.
To connect to a Ray scanner, simply tap the Connect to Ray button.
Connect to the scanner’s Wi-Fi network via your device’s network settings.
To manually connect a Ray scanner for the first time, follow the instructions for Manual connection displayed on the app.

Figure 6 Connect to ray via Wi-Fi, manually.
If a Ray has already been connected, you can select the Ray under Recent connections, and wait for the app to automatically connect to the scanner.
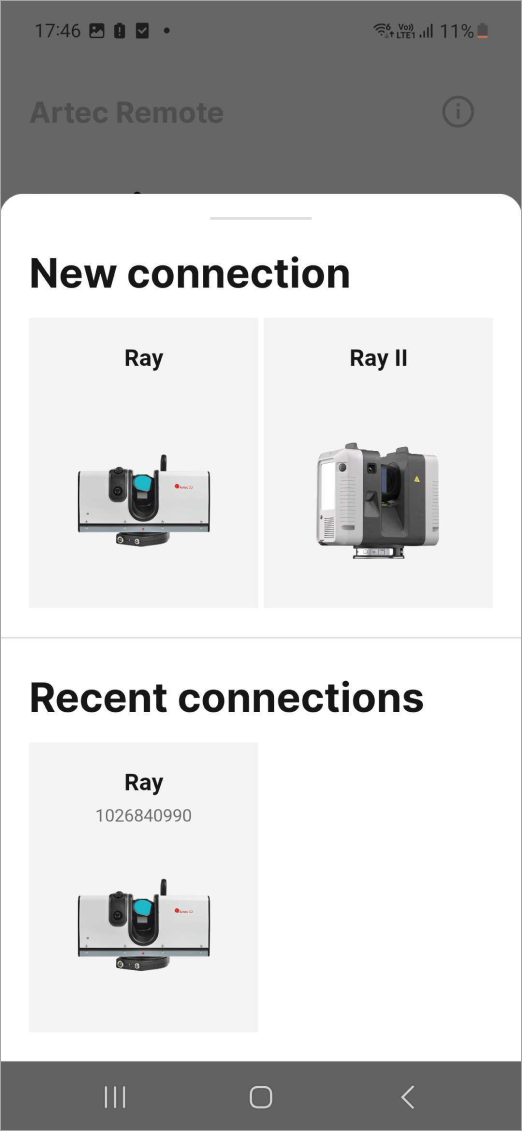
Figure 7 Connect to your last connected Ray automatically.
Note
To ensure proper functioning of the app, grant all required permissions, when prompted.
You can also log in to your MyArtec account using the Log in button, and connect to Ray from your list of scanners. (See more Launch Artec Remote app ).
After successful connection, the app will be ready for operation.
Once you’re done, you can proceed to the preparation of the location and objects to be scanned.