Projects and Scans
Once Leo has booted up, the Project screen appears. Scanner allows you to view projects and scans on its display (Open Project), continue scanning to the existing scan and add new scans to the project.
By default, the most recent project is available on the left of the screen. To invert the order, tap the Date link in the top right corner.
Project Structure
Any Leo project includes at least one scan. If the scan was paused or interrupted and then resumed, an addition appears in the History section of the Scanning screen. You can undo each addition sequentially by navigating the History backwards.
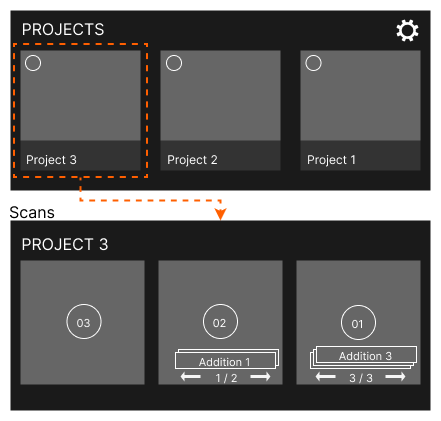
Figure 16 Understanding project structure.
Open Project
To open a project,
Access the Projects screen.
Scroll the list horizontally while consulting the preview images.
Then tap the required project. Leo will display the project structure where you can either add a new scan or continue recording to the existing one.
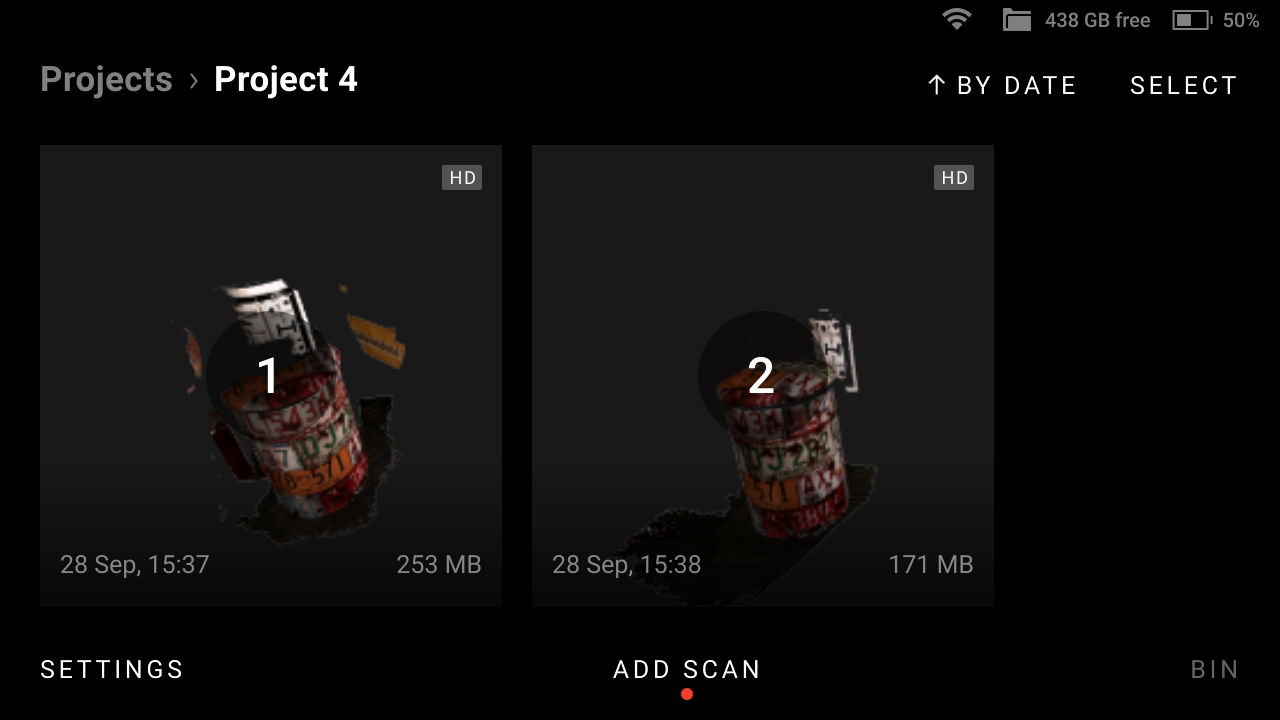
Figure 17 Scans in a project.
Copy Project
To copy a project on your local computer,
Make sure that you computer is connected to the same network as Leo.
Access the Projects → Settings → Cast screen to browser.
Toggle Enable screen casting and Allow control switches.
Open any browser on your local computer and enter the Leo’s IP + ‘/app/projects’.
Select the project(s) you would like to get and click Download button.
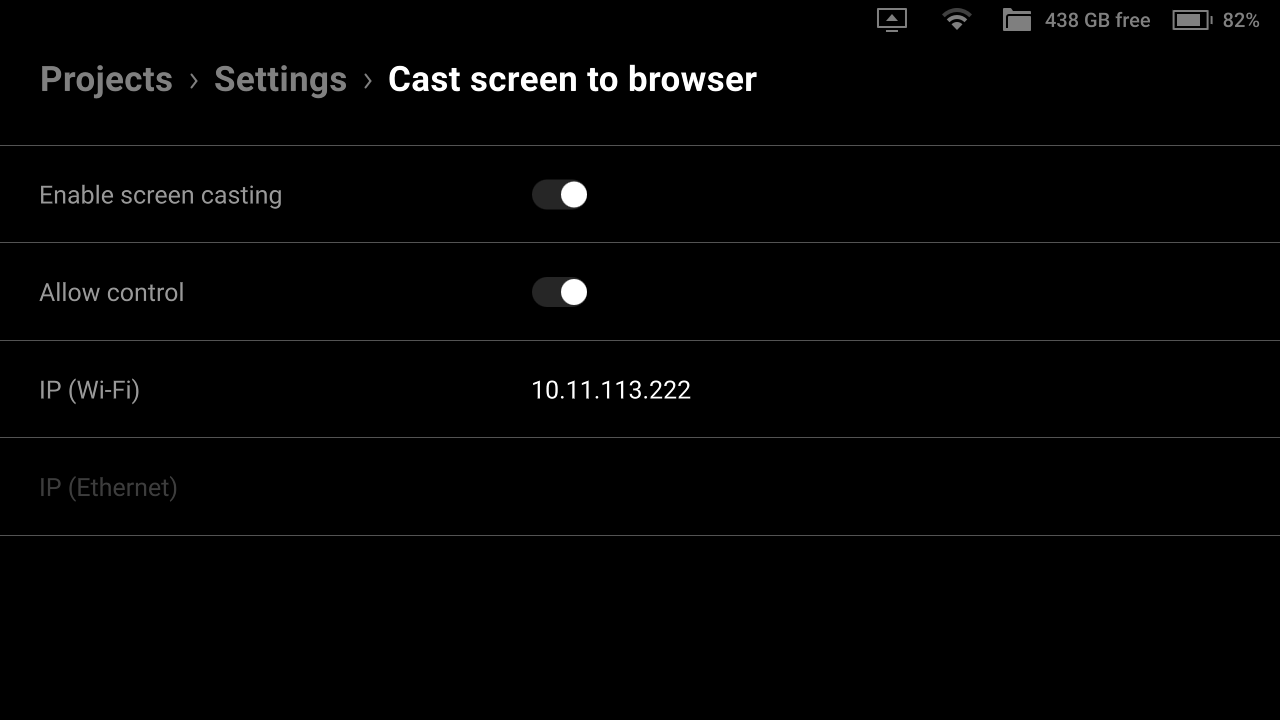
Figure 18 Scans in a project.
Encrypt Projects to Export
To ensure security of HD scan data, Leo enables you to encrypt your projects before exporting them to your local computer through the browser. To do so, turn on the Encrypt projects (AS16+) feature in Settings. After selecting projects, when you tap Download, Leo converts those projects into a new .leo format before downloading them.
Note
The encrypted projects in .leo format are only compatible with Artec Studio version 16 and above.
View 3D Data
Use the following gestures to navigate 3D content on Artec Leo.
Rotate |
Move one finger across the screen around the scene. |
Pan |
Move two fingers across the screen. |
Zoom |
Use two fingers: spread them apart to zoom in and move them toward each other to zoom out. |
To bring back and scale the possibly moved away 3D content, use the Fit to view button.

Figure 19 Viewing a project.
Upload Project to Artec Cloud
Using Artec Leo, you can now upload your projects directly to Artec Cloud without needing SD cards or cables. Artec Cloud is an easy-to-use collaborative platform that makes your 3D scan data available to you anytime and anywhere.
To upload one or several projects to Artec Cloud:
Access the Projects screen.
Tap the Select button.
Select the items that you want to upload.
Tap Upload to Cloud. Artec Leo will automatically upload the items to your Artec Cloud account.
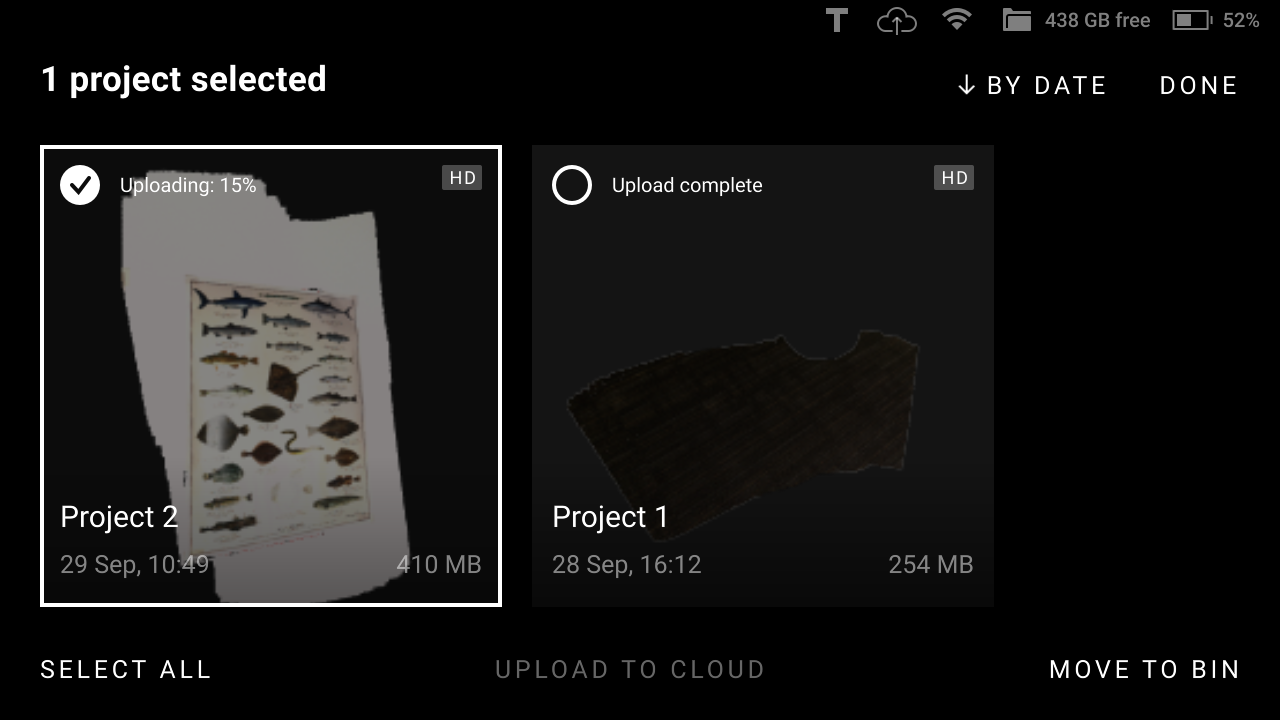
Figure 20 Uploading to Cloud.
Note
Please ensure that your Cloud account has enough storage space before uploading large projects. Also, make sure Leo is connected to the internet until the upload is completed.
Attention
The ‘Upload to Cloud’ functionality is available to Artec Cloud users with a Trial, Collaboration, or Processing license only. Check the Artec 3D website for more information about Artec Cloud licenses.
Rename Project
To rename a project, open the project and open any scan inside the project. On the scan-viewing window, simply tap on the Project name, or click on the Edit icon at the end of the name field, and change the name.
Remove Project or Scan
To delete one or several projects,
Access the Projects screen.
Tap the Select button.
Select the items that you want to remove.
Tap Move to bin. Artec Leo will move the items to the Bin.
Access Deleted Projects and Scans
To access the deleted scans and projects:
Open the Projects screen.
Tap the Bin button. Leo will open the Trash bin showing all deleted scans.
Note
Any deleted project will split into scans once it appears in the Trash bin.
Leo lists all the deleted scans by time created.
Scans are named using the Project 2/1 pattern meaning that it is the Scan 1 from the Project 2.
To select scans in the Trash bin, tap them. To select all items at once, use the Select all button.
To restore scans |
To delete scans |
|---|---|
Tap Restore. The scans will then appear in their respective projects. |
Tap Delete. The scans will be permanently deleted from Leo. |
Trusted Accounts
Only specific users can open projects from Leo in Artec Studio:
Scanner owner
Users from the Trusted accounts list.
To grant the specific user an access to your Leo projects, follow the steps:
Open my.artec3d.
Access the Scanners section.
Scroll to the Trusted account title.
Click the add link.
Enter the email address of this my.artec3d user.
Access Projects on Leo.
Tap Settings
Then select Scanner → General → System.
Tap Renew in the Scanner configuration field.
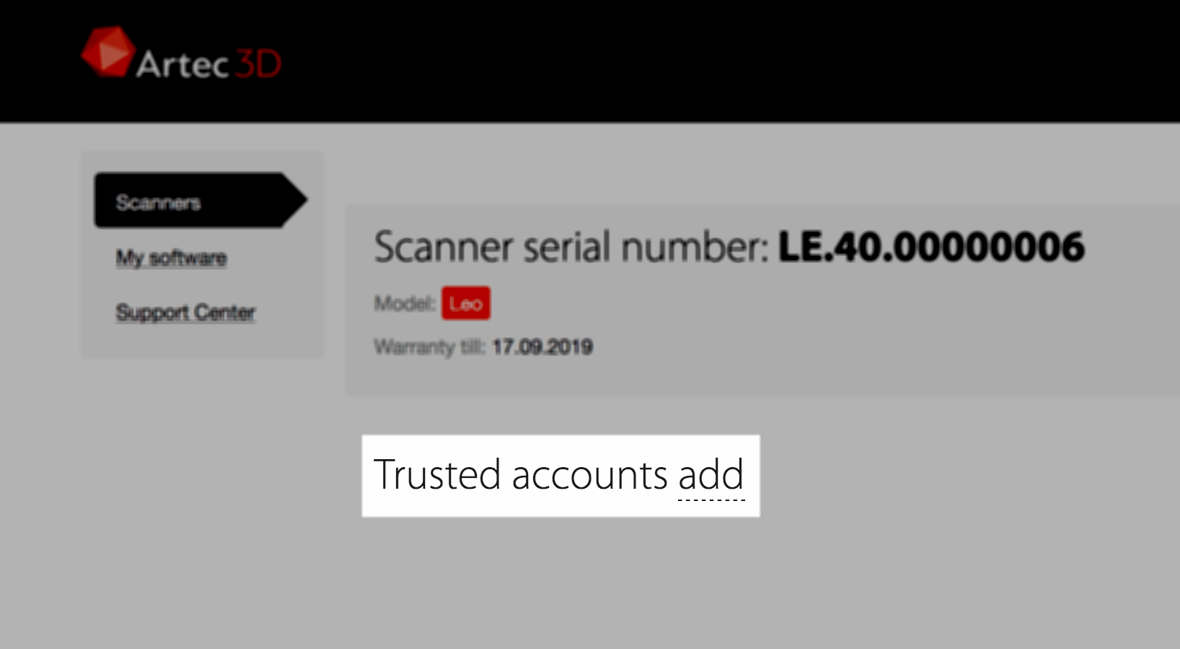
Figure 21 Trusted accounts for Leo.
Attention
If you plan to share a project with someone from the Trusted accounts list by copying a project through a network, first ensure that you have :ref:`renewed the scanner configuration.
Open Project in Artec Studio
Leo produces raw scans that you can process in Artec Studio no older than version 13. It is possible to import projects from Artec Leo over a network (Direct Import in Artec Studio).
Important
The account you use in Artec Installation Center must be either the same as on Leo scanner or one of the Trusted accounts list at my.artec3d.
Important
If you scanned with the Remove base enabled, ensure that the Launch base removal for Leo scans checkbox is selected in Artec Studio settings.
Direct Import in Artec Studio
To successfully import a project from Leo,
Ensure that your computer and Leo are connected to the same network.
Ensure that Leo doesn’t displays any 3D data.
If the device is scanning, cease the session.
If any project is open, close it.
Open Artec Studio.
Select File → Import → Leo project (connect to scanner).
Choose the scanner from the list and click Connect.
Select the required project from the project list and click Import.
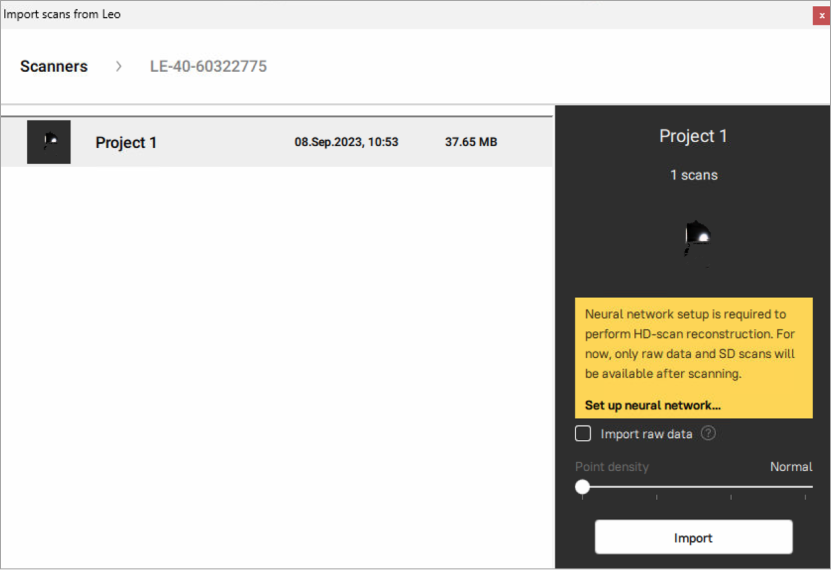
Figure 22 Importing project to Artec Studio.
Once the application imports files, scans will appear in the Workspace panel. The imported project and scans will be automatically grouped — the group with the project name will be divided into subgroups of scans (see here about grouping in Workspace panel).
Process Project in Artec Studio
Once you import the project, process it as Artec Studio Manual suggests.
Important
Double check that the Current scanner type is set as Artec Leo in Artec Studio settings (Scan → Algorithm settings).
Autopilot
One of the convenient ways to process the scanned data from Leo is through using Autopilot. As soon as you import a Leo scan in Artec Studio, select Autopilot in the left toolbar.